Tuesday, September 20, 2011

Pretty Paper-Covered Paper Keepers

It's the beginning of another school year...which means we're all being inundated with insane amounts of paper coming home from school with each of our tiny people...every...day. Homework, graded papers, PTA flyers, info. on extracurriculars. I'm not the "keep everything" kind of mom. I look at the graded papers, give the appropriate acknowledgement, and then {BAM!} into the recycling bin it goes. But, there's still quite a lot of stuff that has to be kept. Fund-raising paperwork, classroom newsletters w/ important information, and the weekly letter books being brought home by the Kindergartener, to name a few. So it quickly became clear that I really {needed} someplace to put all of this....stuff... Enter my $5 solution.

Photobucket


I started out with a set of magazine files from Ikea. I went cheap and bought the cardboard Flyt version...a pack of 5 for $1.99. Being cardboard, they're not completely sturdy...but being cheap I can afford to replace them in a year if I need to, and I do think they'll make it through at least one school year, so I feel pretty good about it. The sad truth, though, is that they're not all that pretty. Enter some pretty scrapbook paper I picked up at Hobby Lobby.

First, I cut each piece into a 5 inch wide strip ~ thus leaving plenty of extra paper to wrap around the side.


Photobucket

You can see that the paper didn't make it all the way to the bottom of the magazine box, so I had to get a bit creative to make sure all the cardboard got covered.

Photobucket

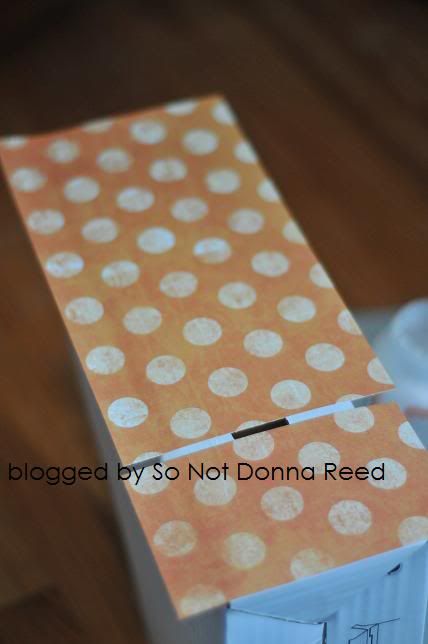
For some of the boxes, that meant overlapping the paper (b/c it was 8 1/2 x 11). I strategically placed the overlap...you'll see why in a second.


Photobucket

For other boxes, I cut the paper (12x12) into 2 pieces and left a tiny white band that matched the spot of the overlap on the other magazine files. I knew I'd be covering those spots over later.
Photobucket

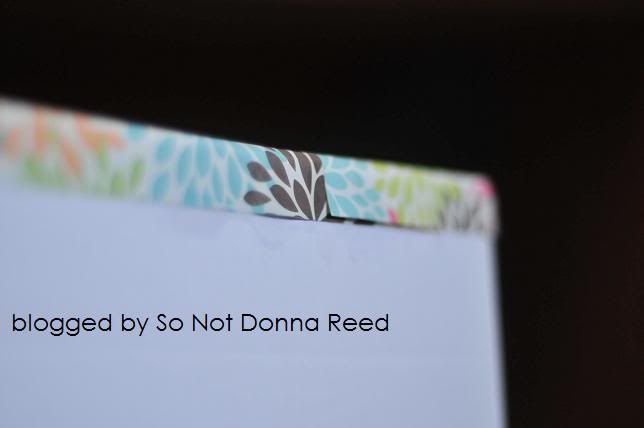
I put a layer of mod podge (of course I did!) on the cardboard, then carefully placed the paper where I wanted it and pressed down to get the paper as smooth and bubble-free as possible. Once the fronts were done, I put some more mod podge along the side of the magazine file and folded the extra paper over the edge.
Photobucket

When that was done, I took the left-over paper and cut 2 inch wide strips, which I then used (again with the mod podge) to cover over the spots where the paper was either over-lapping or cut.
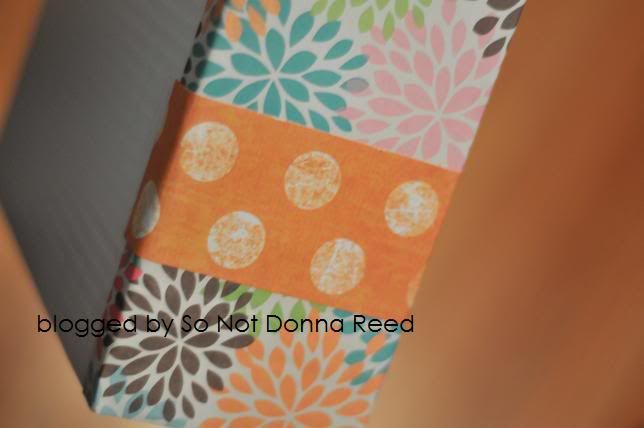
Photobucket

I think the coordinating papers make the boxes stand out...and make them a little bit more {fun}, too.
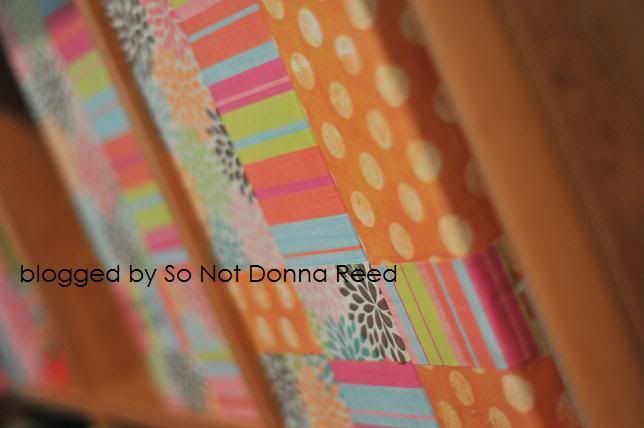
Photobucket

I popped them onto the shelves in my craft room, and now I have a spot to corral all of that insane paperwork that comes home week after week. So far, so good!

Photobucket


My apologies for the crappy photos. The hubband got a new computer, which means I've now got his old one (which is still far better than what I had before) & it's not compatible with the prehistoric version of photoshop I own. I'll be upgrading soon ~ elements 10 comes out in october! until then....all I've got is Paint. UGH.

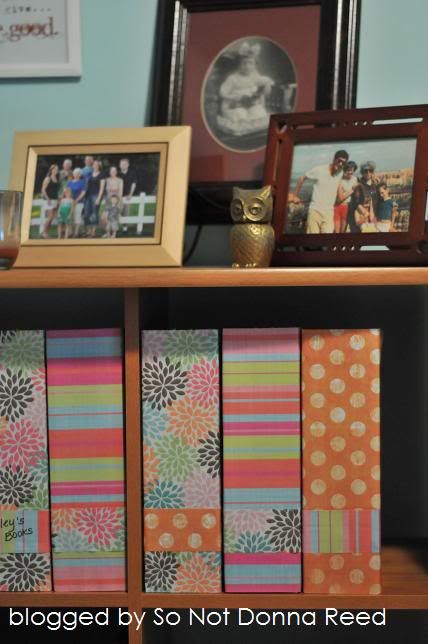
Photobucket

Monday, September 12, 2011

I {LOVE} it when a plan comes together...

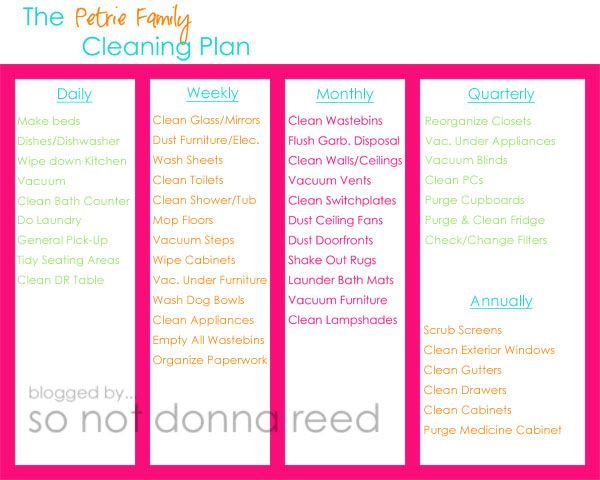
If you're anything like me, keeping the house tidy and staying ahead of household clutter is a constant battle. It has been my goal for a very long time to have my home in a constant state of 15-minute company readiness. And for a very long time I have been failing...{spectacularly}. I've heard all sorts of tips (just do a little bit every day...) tried various kinds of schedules (bathrooms on Mon, bedrooms on Tues, etc.) and even signed up for FlyLady....which only resulted in a crapload of e-mails flooding my in-box and me spending ridiculous amounts of time deleting, responding and trying to unsubscribe.

After several failed attempts and a whole heckuva lot of frustration, I am beyond {thrilled} to say that I have finally found something that works for me. And I'm going to share it with all of you!


Photobucket


The idea for this type of chart came from this post at Jen's IHeart Organizing blog.

The basic idea is to figure out what household tasks you need to do on a daily, weekly, monthly, quarterly and annual basis, and put them on a handy-dandy little chart. Obviously, what goes where is going to depend on your own family's specific needs. For example ~ we are a 2-dog family, so vacuuming really {has to happen} every day or we're dealing with dog hair tumbleweeds. It ain't pretty. If your home is pet-free, vacuuming once a week might suffice. Figure out what works best for you, and go from there!

Also, you'll notice that the tasks are pretty simplified. The words "Wipe down Kitchen" and "Clean Bath Counter" are simplified versions of what I really probably need to do. But it's awfully hard to wipe down a counter when there's stuff on it...so clearing it all off and putting everything away is implied. I did this for a couple of reasons. 1 - Hopefully I can get to a point where the counter is usually clear to begin with, so wiping it down is all I need to do. And 2 - It's important (at least I think it is) to keep the number of items on the daily list down to a manageable amount. There's nothing more demoralizing that feeling like you're failing every day because you can't get to everything on your list. I put the {bare minimum} on the daily list ~ the things that will make the most impact if I don't get them done on a daily basis ~ and then I do my best to get to those things every day.

There are so many {fantastic} things about this chart. I love that it keeps me on task on a day-to-day basis, and that I have a visual reminder of what I've already taken care of and what I have left to do...especially when it comes to some of the monthly and quarterly items. Let's be honest, here. Things like dusting ceiling fans and vacuuming registers...those are the kinds of tasks that I'll put off until the job is so disgusting that I feel the need to shower after I've finished. I love knowing that things aren't going to get that far-gone again! I love that using this list will most-likely help our appliances work better and last longer, because I'm being reminded to take better care of them! My most favorite thing about this chart is that, because I popped it into a page protector, I can mark items off the list with a dry erase marker, and erase the marks when it's time to start over again...so I'm not re-writing the same things over and over again, or wasting paper by having to print it out again and again.

Now...I didn't make a printable of this to share with you all, because it wasn't {my} idea. If you love this idea, but you're not so handy with the computer and what-not, you can head over to Jen's blog and follow the link to her Etsy shop. She has all sorts of amazing and wonderful {goodies} in her shop ~ check-lists, logs, calendars ~ you name it, she's got it. Everything she offers is reasonably priced, and {pretty} to boot.

As for me, I made my own printable in Photoshop & had it printed at Costco (b/c we don't have a color printer at home). I have found that a few of the tasks on the list need to be shifted from daily to weekly or vice-versa, and that there were a few items that I wanted to add to the list, so it's still a work in progress. Not a big deal ~ I'll just keep working off of this one until I have a new one printed.

So, there you have it! I'm not saying it's {perfect} ~ I tried to allow myself a "day off" last week and it took me a lot longer to get everything back in order than I thought it would ~ but it's a major improvement over where I was before I started and I feel like it's something that I can stick with long term. I hope it works for you, too!

Photobucket

Friday, September 2, 2011

TGIF!

Happy Friday, Everyone! :) As usual, I highly suggest that you head over to Tatertots & Jello & check out all the awesome projects and ideas that are being shared. It's {always} worth the trip!

Photobucket

A Happy Scrappy Wreath

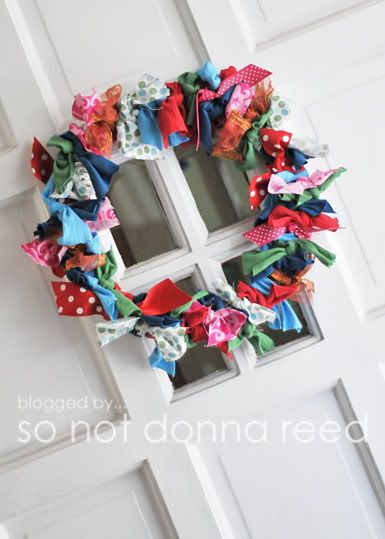
Have you seen all of those {adorable} crayon wreaths all over the web? They're so cute & happy & back-to-schoolish. I had everything I needed to make one of my own ~ the wreath form, the ribbon, and a few boxes of brand new crayons. But I just couldn't {force} myself to "waste" those perfect crayons on a wreath that would hang for a matter of minutes on the first day of school ~ because I have no place to put it inside, and the crayons would melt on my front door.

I still wanted something colorful and {lively} to put up in honor of the start of the school year, so I came up with this....


Photobucket


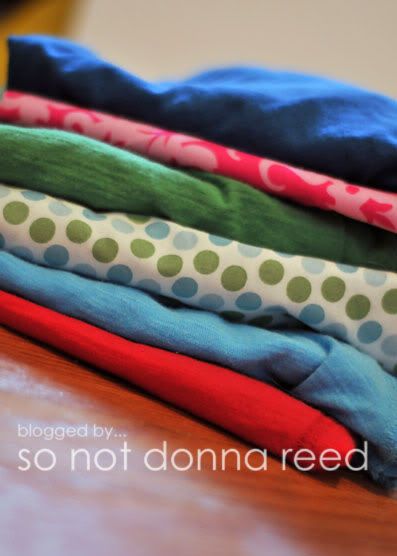
First, I dug around and pulled out some t-shirts I was going to be donating to good will, along with some fabric {scraps} and some bits of ribbon that I had laying around.

Photobucket


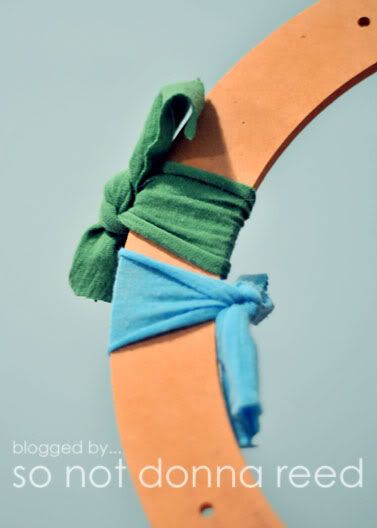
I started out by cutting the shirts into 2 - 3 inch strips, and then cutting the strips into sections that were about 4-5 inches long. I stretched them out a little and tied them around the wreath form.

Photobucket


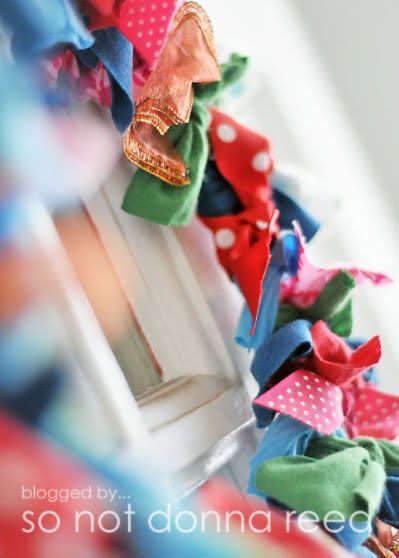
I threw in some strips of scrap fabric (which needs to be longer b/c it doesn't stretch) and ribbon to add more texture and interest, and tried to be as random as I could with placement. I moved the strips around as I tied them to make sure that the wreath form was covered as much as possible, placing some of the knots at the inside of the wreath, some at the outside, and some in the middle, too.

Photobucket


And a reminder of the the end result!

Photobucket


I'm pretty happy with it. It's bright and cheerful while not screaming BACK TO SCHOOL! ;) It came together pretty quickly, too. It's really a great use for scraps, and it would be super cute in specific school colors as a teacher gift, or in more holiday-specific colors - like black and orange for Halloween... Hmmmm... ;)


Photobucket


Wednesday, August 31, 2011

More Than Words

Words are powerful. Not all words, of course, but the right words at the right moment can change a person's perspective or their mind, or even ~ I dare say ~ change a person's life. There are three words that I think of whenever things in my life get a little crazy. Words that ground me, and remind me of the way that I {want} to live my life.

Patience
Presence
Purpose.

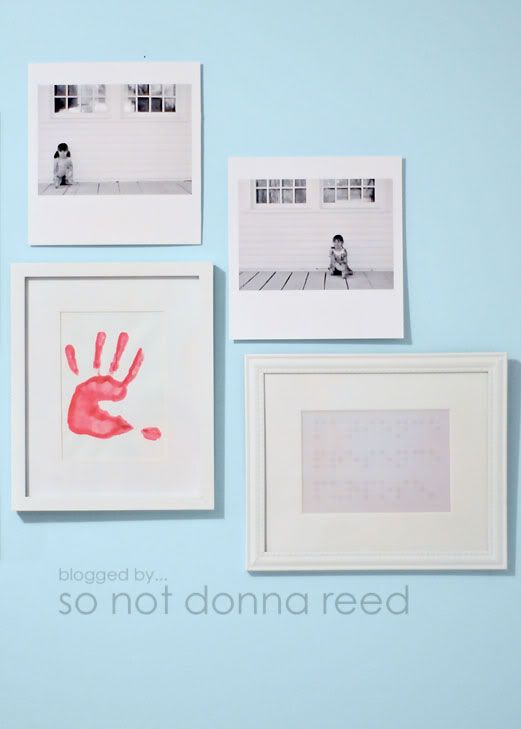
I wanted to have these words displayed somewhere in my home, but I've recently come to realize that my home is becoming just a wee bit {verbose}. Subway art, our family name, some sayings that I love....lots and lots of words. Not wanting to add more obvious word art to the mix, but wanting to have these words around me, I came up with this...

Photobucket

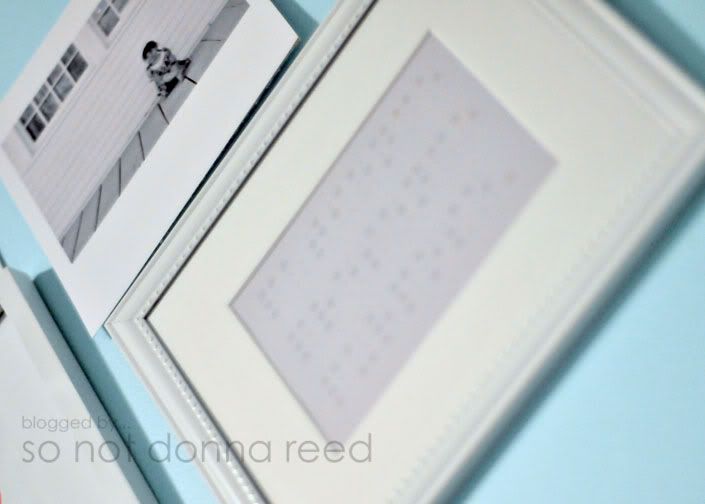
I wanted the colors to be {subtle}, and the braille to really be barely more than a hint, so I chose a lighter grey background and a slightly darker grey for the dots. I simply typed the words that I wanted in a font that I could read (I wanted to know for sure that everything was spelled correctly) and then converted them to braille using a free font I found online.

Photobucket

I really like how it works with the black & white photos on the wall. I also like the way the dots on the frame {mimic} the braille. Not bad for a $2.50 frame from the dollar store.

Photobucket

There are so many things I love about it. The simplicity and subtlety, and the fact that it is a message for {me} that doesn't scream out to everyone who comes into the room.

If you'd like to download one for yourself, you can find the 5x7 printable here.

Photobucket

The Things You Didn't Know You Needed: Part 4

OK, so first things first - I am not a Cricut girl. I am totally, completely and 100% {devoted} to my Silhouette. But... I recently found myself in need of a device that could make perfectly straight & measured cuts to things like photographs ~ and as much as I love my Silhouette, I'm not good enough with it yet to pop a photo into it and ask it to trim off a 1/4" on each side. The Cricut Trimmer turned out to be {exactly} what I needed.


If you're a paper scrapper or a paper crafter, this is obviously something that you would get a lot of use out of. If you're a photographer, digital artist, or digital scrapper ~ and {especially} if you commonly design or print things in "off" sizes like 5x5 or 8x8 ~ you will find plenty of uses for it as well. I found that I needed it when I ordered a pair of 8x8 prints from Costco with a photo floating in the center of a white background. I found out that day that just because the lab offers an 8x8 print doesn't mean that they can actually measure & cut the correct size ~ they rely on the edge of the photograph to know where to cut. Highly annoying, yes ~ but a problem? Not anymore!

This little do-hickey is very affordable (I paid around $10 for mine at Meijer) and it cuts very well. The reviews I've seen give it credit for cutting paper and cardstock, but last night I decided to test it on some matboard and it {rocked}. I had to do a pass on the top, then flip the matboard over and run a pass on the bottom-side of the cut to get all the way through, but it worked perfectly, and folding the matboard after the first cut left a crease on the back that was easy to follow when I went to do the second cut. What this means for me (and probably for some of you, too) is that I can now mount my own photos & digital art pieces on matboard without having to hurt my hands by asking too much of my scissors, or bust out a box cutter. And ~ added bonus ~ this cutter has none of the terrifyingly guillotine-like qualities of those super heavy old-school chop cutters popular in classrooms across America, so I'm not worried about my kids messing with it and amputating a limb. ;)

And now, I'm off to bust out the spray adhesive & mount the above-mentioned photos to the newly cut matboard! Yippeeeee!!!


Photobucket

Friday, August 26, 2011

Little Artists

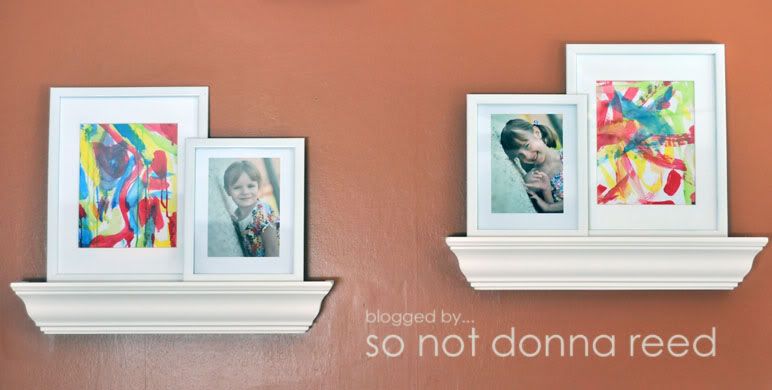
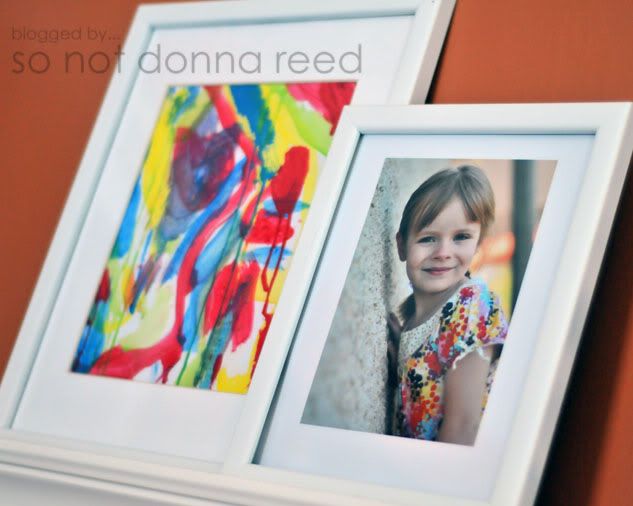
Earlier this summer, I sent the kids outside with some paint and paper, and let them loose. They had a great time, and it was fun to watch them paint and create. They immediately asked if we could hang their paintings in the house, so I set a couple of their paintings aside. This week, I framed one of each of their paintings.


Photobucket


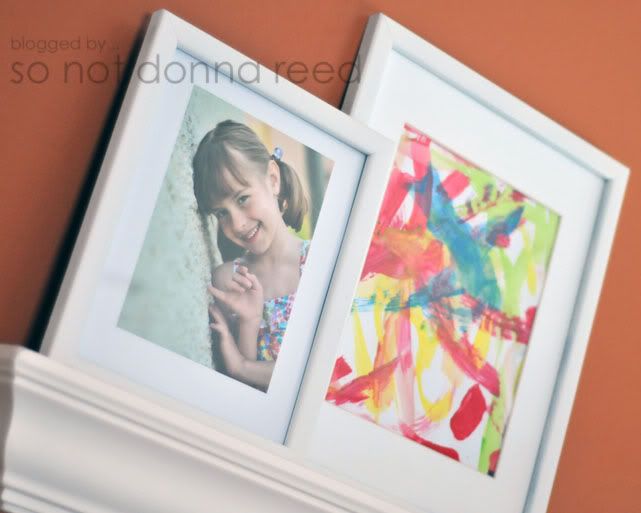
I happened to take photos of the tiny people in these beautifully colored dresses last Spring. I'm {giddy} that the dresses go so well with the paintings they made a couple of months later!

Photobucket


I was actually paying enough attention and thinking ahead enough to initial each of the paintings on the back, so I knew which kid had made which painting. I framed one by each of them, then paired them with a photo of the artist.

Photobucket


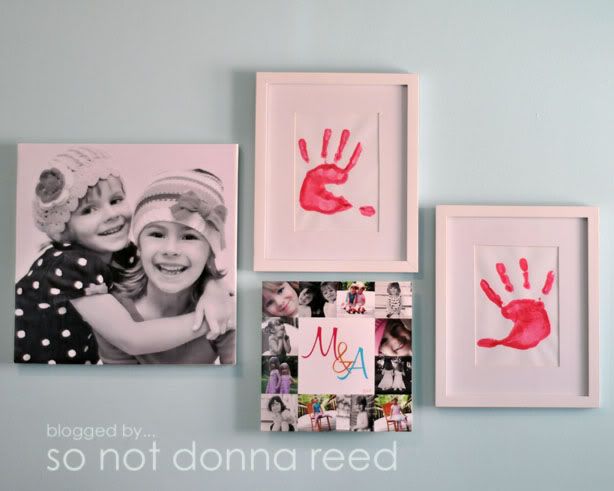
And I'm {very} proud of myself for thinking to make hand prints of both of the kids before sending them in to get cleaned up! All 3 frames wouldn't fit on one photo ledge, so I chose to hang the hand prints on the slowly-growing photo wall in my craft room!

Photobucket


The girls are very excited to have their art displayed in the kitchen, and they love coming in and looking at their hand prints, too. :)


Photobucket

Monday, August 22, 2011

The Things You Didn't Know You Needed: Part 3

There are a lot of cookbooks on the market ~ and there are a lot of websites dedicated to giving you all sorts of cooking and food-related information. But I find that there are very few things that you'll ever {need} to know that you can't find in one of the tried & true cookbooks....Joy of Cooking


Originally printed in 1931, this cookbook has been updated several times over the years. The 75th Anniversary Edition (printed in 2006) boasts a grand total of 4500 recipes ~ 4000 of which were re-tested and updated for the most-recent edition of the book and 500 that were new to this edition. It has all of the usual stuff ~ lists of acceptable ingredient substitutions, charts to help you convert from metric to US measurements, etc. ~ but it also goes out of its way to {explain} the techniques used in the recipes so that you're not stuck if you come across a term that you're not familiar with. I'm telling you ~ this cookbook is a rookie's dream.

{Joy} is also chock-full of tidbits that you don't need to know all the time, but that come in handy ~ like how to figure out what sized bird you'll need to feed the whole family on Thanksgiving, which kind of wine or beer goes well with what type of food, what equipment you'll need to make certain things, and how to store various types of ingredients.

If you're someone who loves to cook ~ if you're someone who wants to learn to cook ~ if you're looking to buy a gift for a cook ~ you should pick up a copy of Joy of Cooking. It's {well} worth the $35 price tag!

Photobucket

Friday, August 19, 2011

Happy Friday!!!

I'm cooking up some blog-worthy ideas for next week, but to hold you over until then, head over to Jen's fabulous blog for some great inspiration!

Join  us Saturdays at tatertotsandjello.com for the weekend wrap  up           party!


Photobucket

Thursday, August 18, 2011

Sneaky Mommy

Ahhh, back to school. It's that time of year when moms all over the country are forcing their children to try on every article of clothing they own to determine what fits and what doesn't....then dealing with the same children arguing about the cool shoes, trendy backpack, designer jeans, etc. they just {have to have} for the new school year.

Want to avoid all that? Yeah, me too. So how about this little trick.

Photobucket

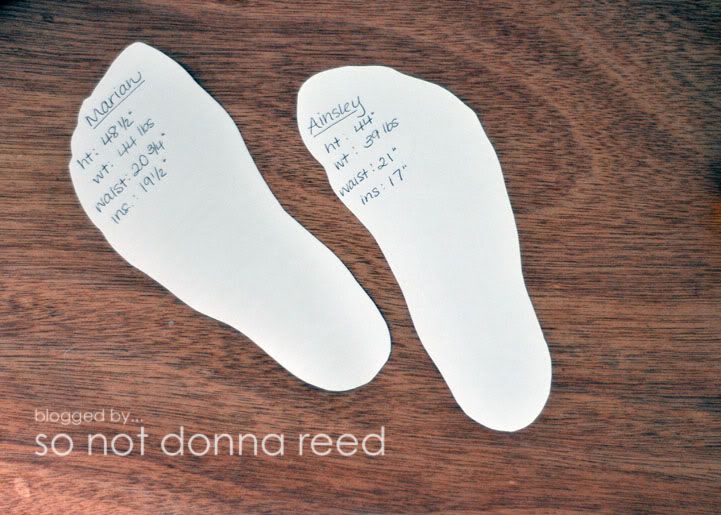
First, I had the tiny people take off their shoes and I traced their feet. (Make sure you label which foot belongs to which kid!) There are online resources that will tell you how to measure your kids' feet, but I find that shoe sizes vary from store to store, and even brand to brand, so measuring their feet for size and writing down a number is probably not the best way to go. This way, I have a visual when I shop. I can hold it up to the sole of a shoe and know whether or not the shoe is long enough and/or wide enough, and how much room there will be for growing. Perfect!

I also wrote the rest of their information on their individual foot prints ~ their height, weight, inseam and waist measurements, so I can buy clothing when I'm shopping solo, based on their measurements rather than size. I pop the foot-shaped cut-outs into my wallet and have them with me all the time ~ which comes in handy when I start doing the {Christmas} shopping, too. ;)

So, what are you waiting for? Leave the kids at home and go shopping!

Photobucket

Wednesday, August 17, 2011

My First Piece of Furniture!

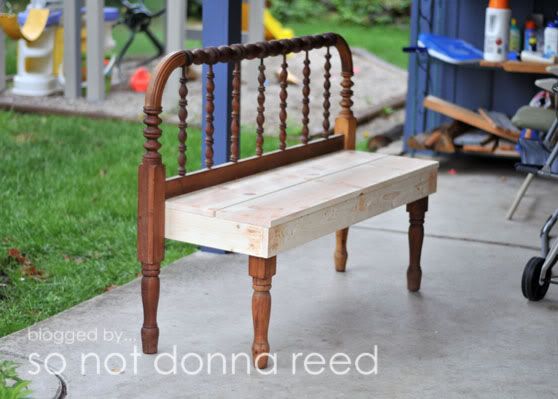
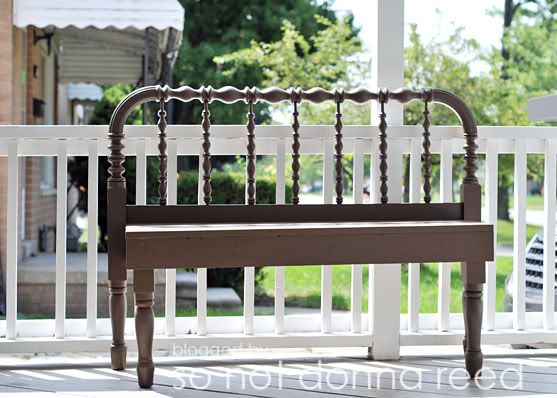
I can't tell you how excited I am to share this next project! Over a {year} ago, I picked up a beautiful spindle bed frame at a garage sale, with the intention of turning it into a bench. If you google "headboard bench" you'll probably find lots of posts about these pretty little creations, and I found inspiration on several blogs myself. Finally, over the weekend, I got started on making my own (with help from the hubband, of course...).

I'd show you the end result now...but I want it to be a surprise, soooo... ;)

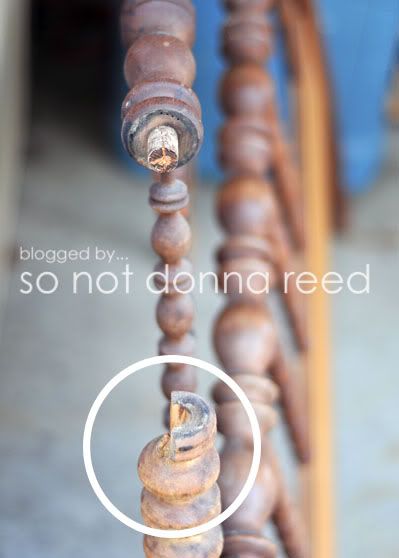
We started out by assessing the headboard & foot board. Both ends of the bed were exactly the same in size and shape. There was a broken piece on the headboard, and a missing spindle on the foot board. {Luckily} what was broken on the head was okay on the foot, and we knew that we could take the foot apart and replace the broken piece on the head. Not that it was easy to do...it involved a rubber mallet, a carefully used sledge-hammer and a lot of pounding, but we did it!


Photobucket


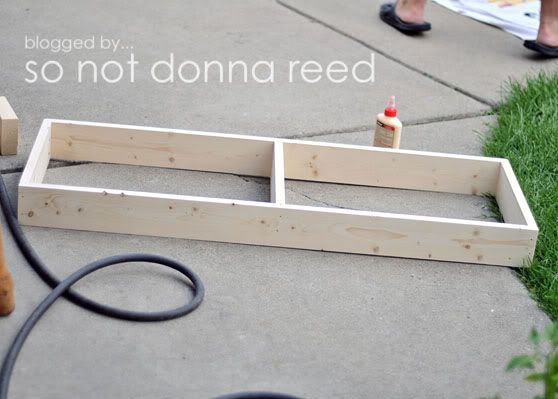
Once that was done, we built a box to use as the base of the seat using 1x4s, using an extra piece of wood in the center of the box for added support. Of course, I sanded all of the boards, and I got to use the compound miter saw to cut the boards to size. (OK, so I only got to cut a couple, but I did it!) We used a brad nailer (FUN!) for the box.


Photobucket

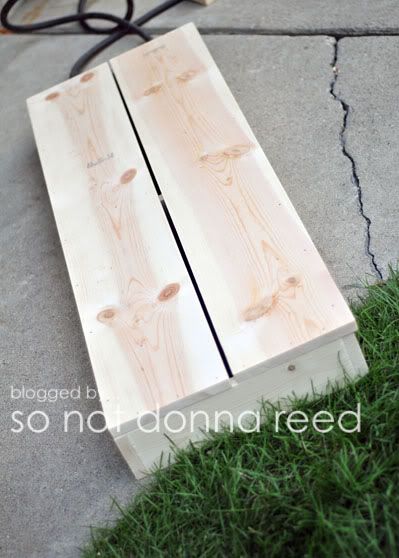
Then we put two boards across the top to finish off the seat. (Again with the nail gun.) We left a small gap between the two boards to that there would be a place for water to run through (since our bench is meant to be used outside).

Photobucket

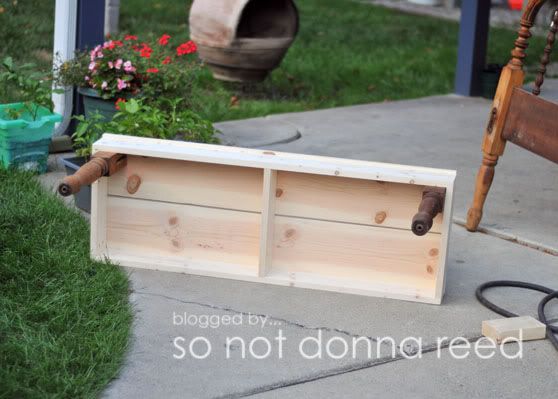
Once the seat boards were on, we attached the legs to the underside of the seat using screws. Since we knew that we wouldn't be able to use the foot board to make a second bench, we went ahead and cut off the legs of the foot board to use as the front legs of the bench. After we attached the legs to the seat we went back and added some brackets underneath the seat just to make sure it wasn't going anywhere.

Photobucket

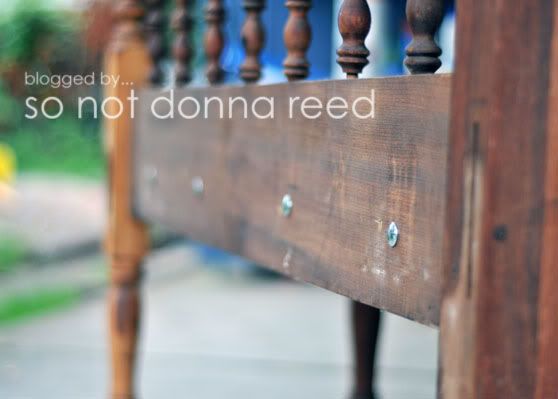
We then used some pretty serious bolts to attach the seat to the headboard....which I suppose I should start calling the back of the bench now! ;)

Photobucket

Here's what we had at that point.

Photobucket


You can see that there are several different colors of wood happening here, even without the unfinished wood we used on the seat. We filled the holes, then chose a brown paint (the name of the color is mudslide) and applied a couple of coats to the whole bench. And here she is!

Photobucket


I'm {thrilled} with the outcome! :) And it was fun to get to use a bunch of serious power tools in the process. Now I'm thinking about some sort of colorful pillow to put on the bench to give it a little bit of a pop. Hmmmmm.....
Photobucket

Tuesday, August 16, 2011

The Things You Didn't Know You Needed: Part 2

This next item isn't all that exciting or sexy ~ but I promise you, if you're a mom, having this puppy in your home will change your life.


http://www.exergen.com/medical/TAT/tatconsumerpage.htm

This is the Exergen Temporal Artery Thermometer. {Wha-huh?} Let me explain. With this thermometer, you can quickly and easily ~ and non-invasively ~ take someone's temp. simply by running the head of the thermometer across their forehead. These thermometers are being used more and more in hospitals, and there are so many things I {love} about ours.

First, at around $35, it's totally affordable. And it requires no probe covers, unlike digital ear or mouth thermometers ~ so not only will you not have to shell out more money down the road just so you can keep using it, but you're also not going to be stuck in a situation where you'd *like to* use it, but you can't b/c you don't have the probes. It's quiet & non-invasive enough to use on a sleeping child, but because it's so quick & painless, kids will actually sit still so you can take their temp. In fact, my tiny people can take their own temperatures ~ it's that easy to use. Most importantly, it's accurate ~ even more-so than a temp taken in the ear. And, because it doesn't come into contact with the mouth, nose, ears, etc. it doesn't spread germs from person to person ~ and cleaning is super quick & easy. Just wipe the head with a little rubbing alcohol on a cotton ball and you're done!

Like I said, not all that exciting or sexy ~ and it's certainly not something we use every day, but it's something I am so so glad we have. After having one of those fancy digital ear thermometers, and dealing with the kids not wanting me to stick it in their ears (and they've never had ear infections...so it's not like they were in pain!) I'm thrilled to have something that's so much more convenient and simple. I can't tell you how great it is to be able to go into a quiet bedroom at 3am and check a child's temp. without waking them. Or how great it is to be able to check as often as you want without going through tons of those ridiculously overpriced probe covers! I'm telling you ~ it's one of my {favorite} things, for sure!

Photobucket

LinkWithin

Related Posts Plugin for WordPress, Blogger...