Tuesday, June 5, 2012

Fancy Wooden "Frame" Knock-Off...

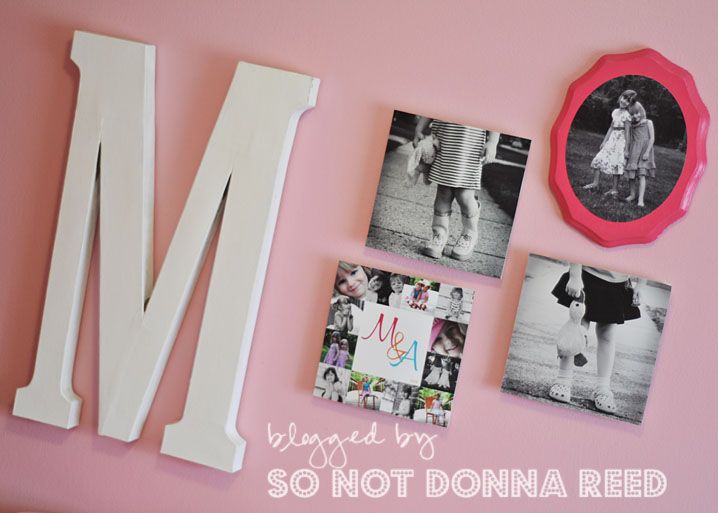
I know I can't be the only one who gets a little frustrated with the craft blog / pinterest world. I see so many things I would love to recreate in my own home, but there's always something prohibitive. Either the project would have to be hugely modified to fit into my tiny home...or I'd have to have someone help me because I'm not good enough at sewing or using power tools to do it myself...or I'd have to attempt to justify spending what the hubband would think is a ridiculous amount of money on something that has no function or purpose other than to look pretty. Take this {beautiful} gallery wall from our lovely Jen at Tatertots & Jello. There is nothing about this that I don't absolutely love & adore. Except the cost. Not that these frames are over-priced ~ on the contrary, I believe they're very affordably priced ~ it's just that our budget doesn't currently have room for a wall of frames...+ shipping. (If yours does, you can find these awesome frames here... ) Not that we'd be sunk if I ordered them...but with kids who want to start dance classes, and my hopes of a family vacation this summer, and an upcoming family wedding (YAY!), I can find so many other, "better", uses for that money.


What my budget does have room for is a $3 unfinished wooden plaque from Hobby Lobby. Yep...$3. Get a load of these puppies...


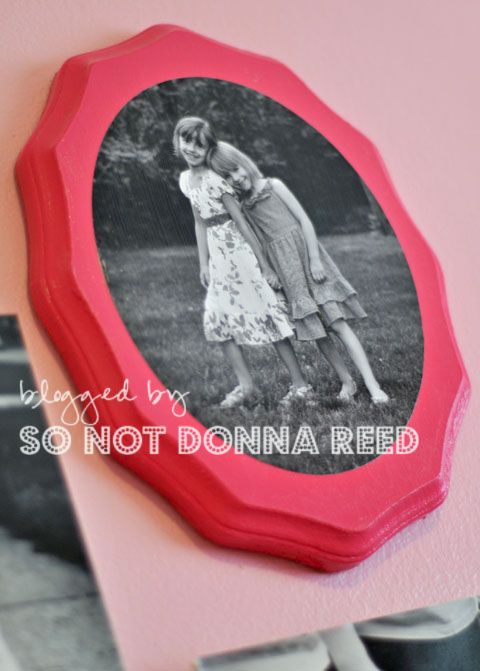
I used one of those, to make this...
Photobucket

I chose the French Oval plaque for my first project. Knowing that I wanted to use it in my daughters' bedroom, I grabbed some craft paint in hot pink while I was there. You might be wondering why I chose craft paint instead of spray paint ~ and the answer is simple...it's less expensive. I sanded the edges of the plaque (I did a half-a$$ed job of it...I'm not gonna lie...) and put on a couple of coats of paint.
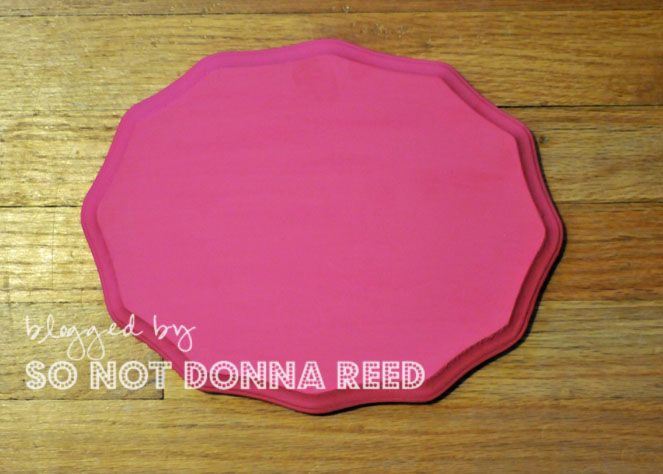
Photobucket
After I had the plaque, I realized that I didn't have a photo that I was really excited about using. So a trip to the park with my subjects had to happen. I was lucky and got a great shot of them that I just love. Looking at the photo and the plaque, I decided that the hard edges of a rectangular picture would be a bit harsh against that soft lines of the French Oval plaque ~ so I worked a little photoshop magic. Once I had the photo transformed into an oval, I moved it onto a plain white background, floated it in the center, and ordered an 8x10 print from my lab.
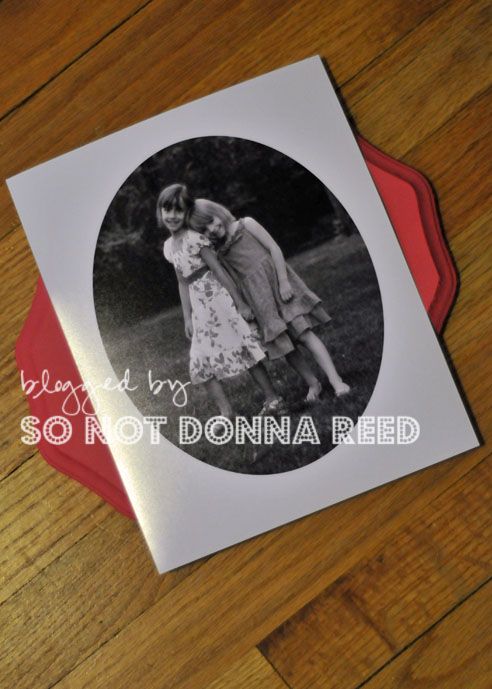
Photobucket
Now for the hard work. ;) I cut out the picture, then covered the plaque with an even coat of ModPodge. Then I carefully placed the photo in the center of the plaque, and gently worked out the air bubbles under the picture. Now...I'm notorious for getting all excited at this point and rushing through the next steps because I just can't wait to see how it's going to turn out. Let me tell you ~ that is one surefire way to get wrinkles and ickiness on your picture. So I had to work reallllllly hard to walk away and let it be for a while.
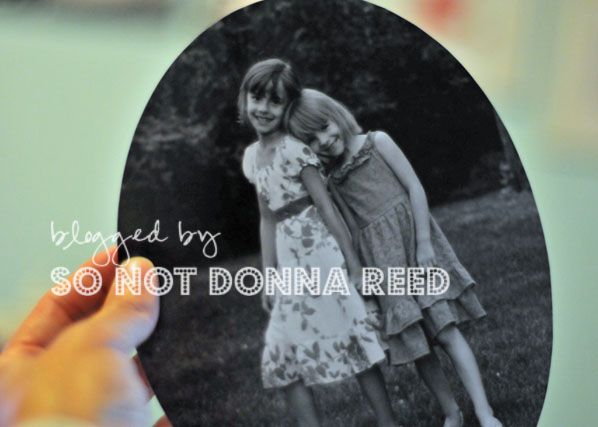
Photobucket

After the first coat of ModPodge had dried, I came back and put another coat over the whole thing...picture and all. If you're wondering why, there are a couple of reasons. First, I'm using gloss / lustre MP, rather than the flat variety. There's no real reason for that decision ~ it's just what I have and I'm not buying new when I have some left. If I just did the frame, the frame & the photo wouldn't match in sheen, and I wanted them to match. Also, MP gives a bit of protection for the photo itself.
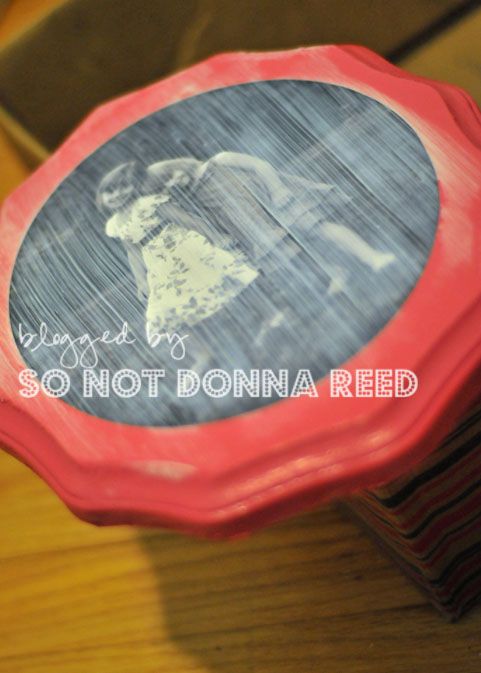
Photobucket

I let it dry overnight, and then today, while the girls were at school, I mounted it on the wall in their room using command strips. (LOVE those things!)

Photobucket

Here it is with a bit of context.

Photobucket


I have every intention of doing this again, probably a few times. I'd like to add a couple of these to the gallery wall in my craft room, and I'm kind of {loving} the idea of this kind of frame for a seasonal holiday pic of the tiny people.

So...the plaque was $3 ~ the print was $1.50 ~ the paint was around $1 (and I have plenty left over). I had sponge brushes & ModPodge already. So we're looking at a grand total of right around $5.50. Yeah, I think my budget can handle that. ;)


Photobucket

Thursday, May 3, 2012

You Don't Wanna Miss This!

If you do the whole digital scrapbooking / hybrid crafting thing, you know how great freebies are. Even better when the freebie comes in the form of a {huge} and spectacular collaboration kit! That's what I'm here to tell you about. Head on over to Design House Digital & hop on their blog train! This blog train isn't one of those obnoxious ones where you have to download a chunk from each blog & it takes forever, and you end up getting at least one link that doesn't work so you end up with an incomplete kit. Oh, no.  They did this {smart}. You pick up one letter at each blog, and those letters together are your coupon code to pick up the kit for free! Soooo much easier. Check out the rest of their freebies while you're visiting ~ they've got some great ones!!! Enjoy!

  Photobucket

Tuesday, March 27, 2012

A Quick Pitch

Hey, all! I'm participating in the 2012 American Cancer Society Relay for Life! I'm so excited about it - not just because we've got a great team and it's such an amazing cause, but because it gives me an opportunity to fight back against a disease that has had such a huge impact on my life. I was only 7 when my dad died from lung cancer, and since then I've also lost an aunt, a cousin, a great-uncle, and far too many friends and loved ones - and watched as many more have bravely battled and won. I'm ready to fight back!

I'm working hard to reach my fundraising goals, and one way I'm doing that is by selling digital art. Below are links to just a few examples of some of the projects I've done in the past. Family dates, maybe a favorite saying or song lyric, or a line from a movie...inspiration can come from anywhere - and it's for a great cause! If you see something you like, and would like me to create something similar for you, just give me a shout! You can e-mail me at sonotdonnareed@yahoo.com


http://sonotdonnareed.blogspot.com/2012/01/different.html
http://sonotdonnareed.blogspot.com/2011/12/gift-of-date-night.html
http://sonotdonnareed.blogspot.com/2011/12/christmas-cheer_05.html
http://sonotdonnareed.blogspot.com/2011/08/more-than-words.html
http://sonotdonnareed.blogspot.com/2011/08/days-to-remember.html
http://sonotdonnareed.blogspot.com/2011/07/happily-ever-after.html

Or, if you'd like to help out with a good old-fashioned donation, you can follow this link to donate directly to my team! THANK YOU FOR YOUR SUPPORT!!!


Photobucket

Thursday, March 15, 2012

Gone to the Dogs


Those of you who have pets will likely agree that, while we do know that our pets are animals, they are still considered to be members of our {family}. Our family includes 2 dogs ~ Molly, an 11 1/2-year-old chocolate lab who is a stubborn, and incredibly affectionate, trouble-maker...and Sam, a 6-year-old yellow lab (we got him from a rescue group when he was 2) who is my protective shadow, and tolerant of tiny people who like to do things to him...like make him wear hats.

As with the other members of our family, I like having photos of our dogs (including Belle, our first yellow lab) displayed in our home ~ but it had never occurred to me to do anything other than photos until I stumbled upon this link on Pinterest.

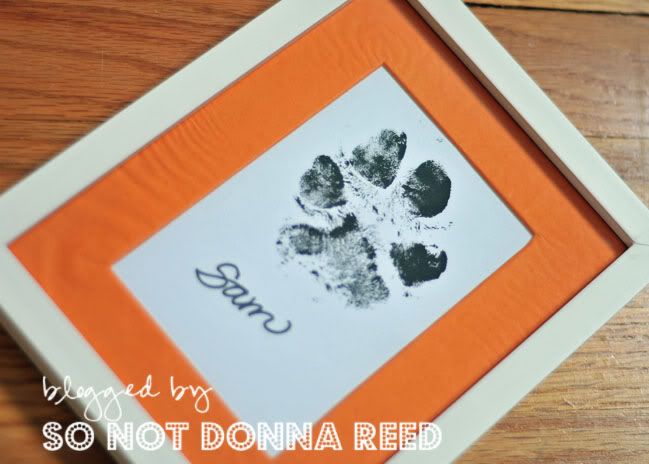
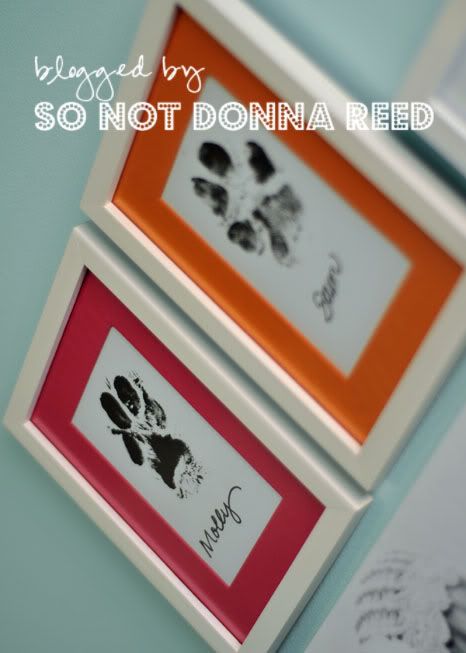
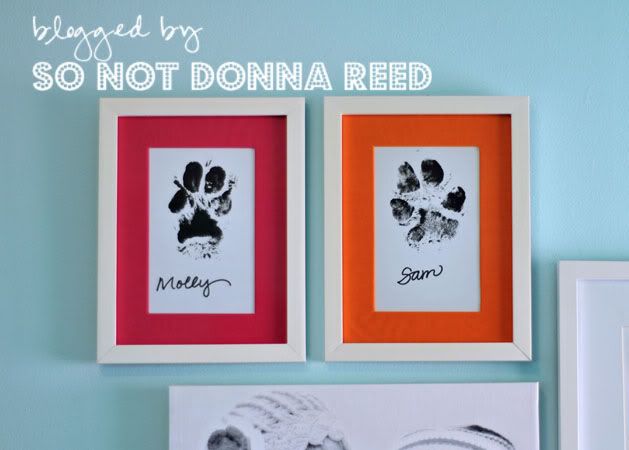
I knew I wanted to make my own version, and this is what I ended up with...

Photobucket


There are, sadly, no pictures of the paw-printing part of the process. I'm pretty sure you can figure out why... 2 dogs, 1 human, a windy-ish day....yeah. I'll give the best description I can!
To get this....

Photobucket


You will need:
A paper plate
A paint brush
Paint
Paper Towel or a Junk Towel
Cardstock
A dog! ;)

Step 1 - Get your dog/s & all of your supplies set up outside. Unless you're desperate for an excuse to get new flooring.

Step 2 - Pour a little bit of paint onto your paper plate and use the paint brush to spread it around. Make sure you've got enough paint spread on the plate to cover your dog's whole paw.

Step 3 - Put the plate on the ground and guide his/her foot into the paint. Press gently on your dog's paw to make sure you're getting paint on all of the pads.

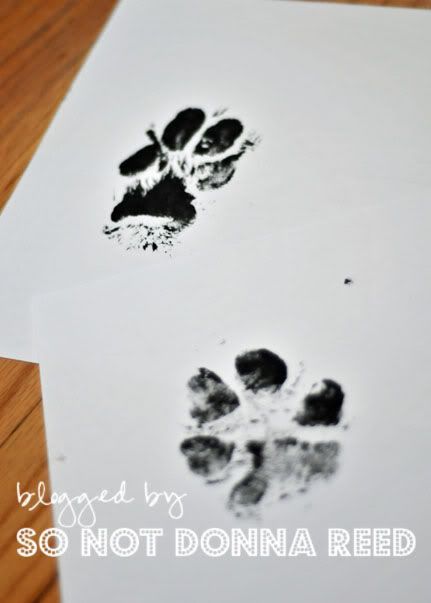
Step 4 - Lift your dog's paw, slide the plate out, and slide the paper into place. Make sure you position the paper so that the paw print will be where you want it to be. Gently press your dog's paw onto the cardstock. You may find that there is too much paint on his/her paw, making the print come out messier than you want. If that's the case, go ahead and try again on a fresh piece of cardstock. Sometimes, the second print comes out better than the first. Keeping this in mind, you may want to use a paper towel to blot some of the paint off of your dog's paw before putting it onto the paper.

Step 5 - Using an icky towel or a paper towel, gently wipe off your dog's paw to remove any left-over paint. (I also filled a shallow dish with warm water and dipped their paws in, just to make sure they were clean before they came into the house.)

Next, I used some $3 frames from Meijer. They came with plain white mats, but I wanted something with a bit more personality. Not wanting to make a bunch of stops at different stores, I decided to hit the gift-wrap aisle and see what I could find. After a lot of debate (I wanted coordinating colors, but not matching, and nothing printed b/c it would be too busy, and it had to be CHEAP) I settled on a pack of multi-colored tissue paper.

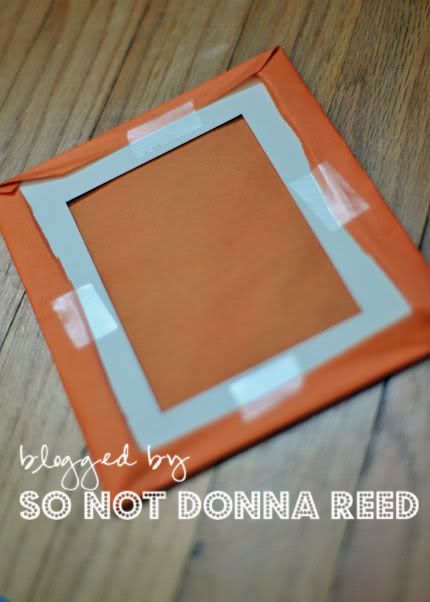
I laid the mat down on the paper and cut around the outside. Then I taped the paper down onto the back of the mat, like I would if I were wrapping a gift.

Photobucket


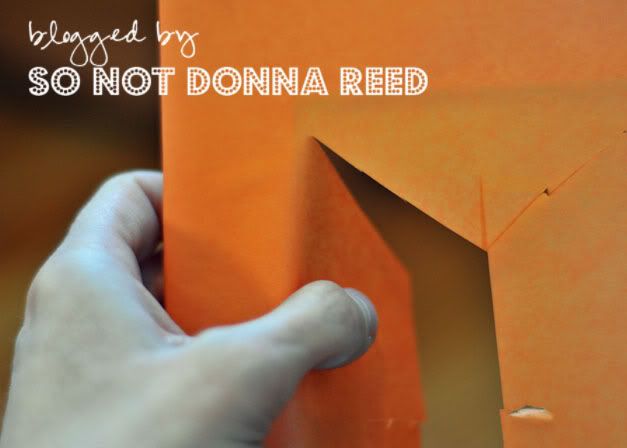
Next, I poked a hole in the center of the tissue paper, and cut slits all the way to each of the corners.

Photobucket


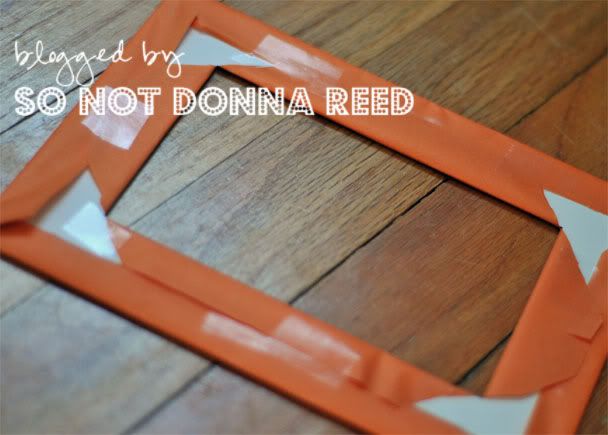
I wrapped those around, too, trimming off any excess. This is what the back of the mat looked like when I was finished.

Photobucket


Next, I trimmed the cardstock down so that the paw would be placed where I wanted it to be in the frame. When I was happy with that, I busted out a Sharpie (so high tech) and wrote the dogs' names underneath their paw prints. I would know which one belonged to which dog, but I wanted other people to know, too.

Photobucket


Finally, I popped them into their frames, knocked a couple of nails into the wall, and hung them! :) So bright, cheerful, and happy. And now that I'm seeing them on the gallery wall in my craft room, I'm debating about doing something fun to some of the other mats, too.

Photobucket


I have to say, I absolutely adore the end result. Are there random black paw prints on my driveway? Yes....yes, there are. But I'm okay with that. And I can tell you, I'll be doing this project with every dog we have from here on out. I hope you will be, too!

Photobucket

Monday, March 12, 2012

Unwanted "Follower"???

If it's happened to me, I'm sure it's happened to others. You log onto your blog to see if there are any new comments, etc. and you see that you have a new follower! YIPPPEEEE!!! But wait. You then look at the picture of that new follower and you see something completely inppropriate. I mean, I'm sorry...but I don't need to see a photograph or your body parts (or, more likely, a photo you've stolen of someone else's body parts) among the smiling faces of my {real} followers, thankyouverymuch.

If you find yourself in this situation, here is a link to a site that will walk you through the quick & easy process of getting rid of these....people. ;) I hope it helps someone!

Photobucket

Friday, March 9, 2012

Top O' the Mornin'

It's March...which brings along so many things that I love. Baseball pre-season games start playing on the car radio, March Madness basketball begins, and I get to celebrate the teeny tiny part of my genetic make-up that hails from Ireland. ;)

Last year I whipped up a quick little St. Patrick's Day printable, which you can find here...

This year I decided to throw together a quick & easy little project.


Photobucket


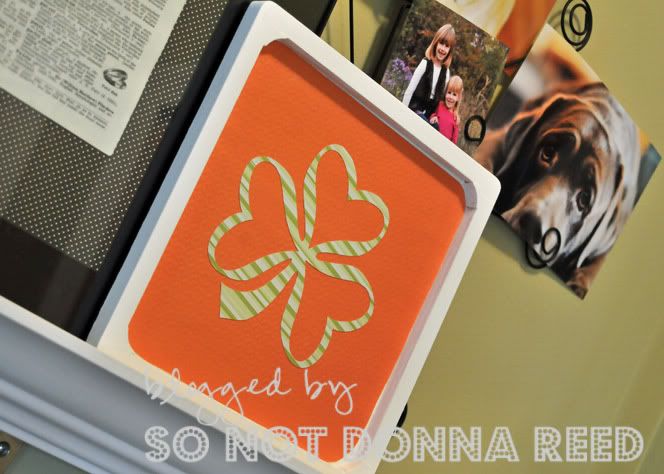
As you can see, it's mostly orange. You might be wondering why I went that route. Well, the Irish flag is green, white & orange - and traditionally, the green is symbolic of Catholicism, and the orange is symbolic of Protestantism. I'm a Protestant (Lutheran), so I like the orange!

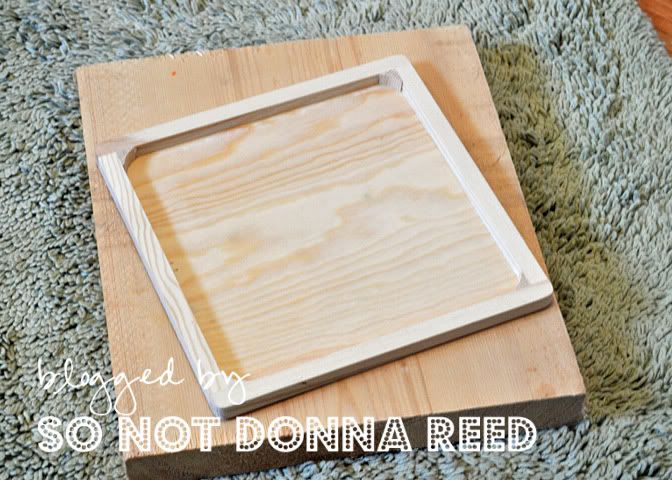
I started out with this lovely little $2 wooden plaque...


Photobucket

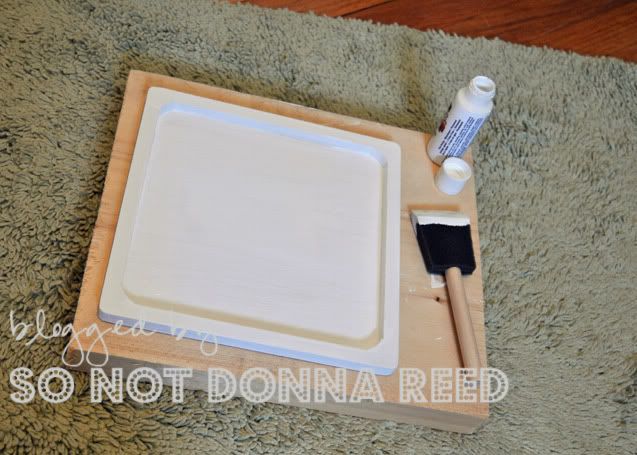
I gave it a couple of coats of white craft paint...

Photobucket

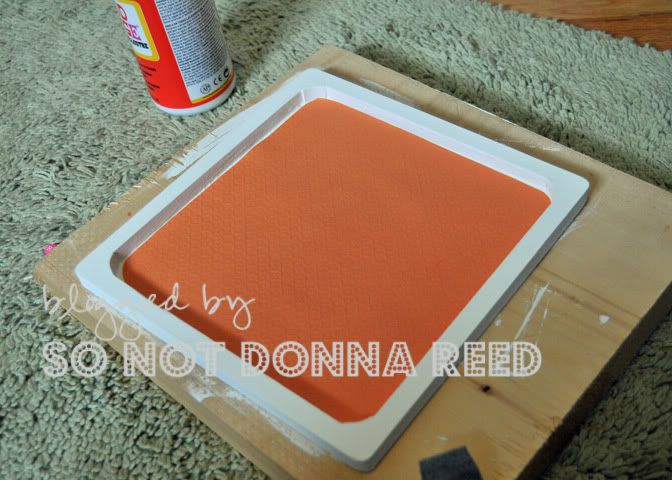
I had picked out some pretty orange cardstock, which I cut to fit inside the plaque. I used some Mod Podge to adhere it to the wood...

Photobucket

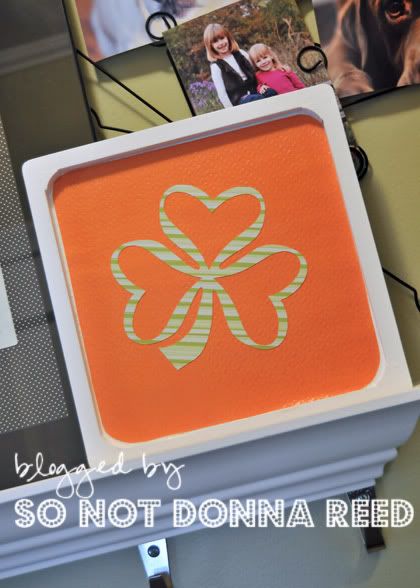
I picked up some pretty green and white scrapbooking paper, which I cut into a shamrock using my Silhouette. And, again with the Mod Podge. ;)


Photobucket

It's a happy little St. Patrick's Day greeting, right inside our front door...

Photobucket

Another quick & easy project...which seems to be all I have time for these days! I've got more up my sleeve that should be coming soon. Stay tuned!!!

Photobucket

Saturday, March 3, 2012

Mmmmm....bacon...

I don't know about you all, but whenever we're invited to any kind of "bring a dish to pass" gathering, I'm at a loss. Sweet? Savory? A dip of some kind? I never know what to do. We had such an event last weekend, and I struggled for well over a week trying to figure out what to bring. Finally, I did what any logical person would do...I turned to Pinterest, and picked something from my food board. Oh, come on...you know you'd do the same thing! ;)

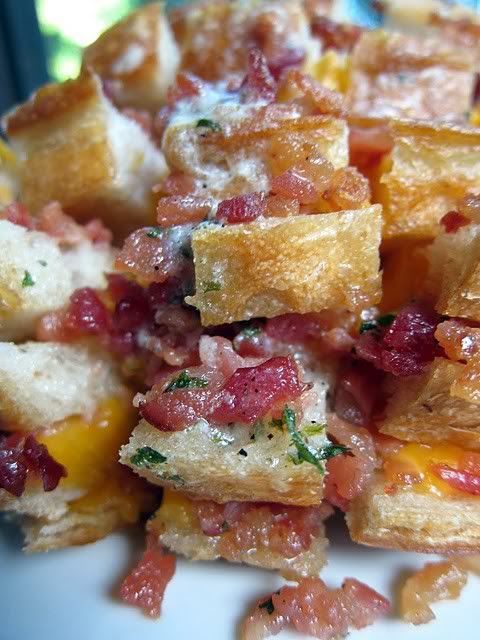
In the end, I decided to make what is known to many as "Crack Bread". It doesn't disappoint...

Photobucket
(Photo from Plain Chicken blog)

You can find the recipe at the Plain Chicken blog by following this link... http://www.plainchicken.com/2011/07/cheddar-bacon-ranch-pulls.html

Since our party took place on the first Friday of Lent, and our hostess is a vegetarian, I made one loaf with bacon & one without. Both turned out ah-mazing. If you haven't pinned this one yet, PIN IT...and then be sure you follow through. Totally worth it!

Photobucket

Thursday, February 16, 2012

Look It Up!

I might be a little too excited about the project I made today... (Mom, you might want to avert your eyes...)

Photobucket


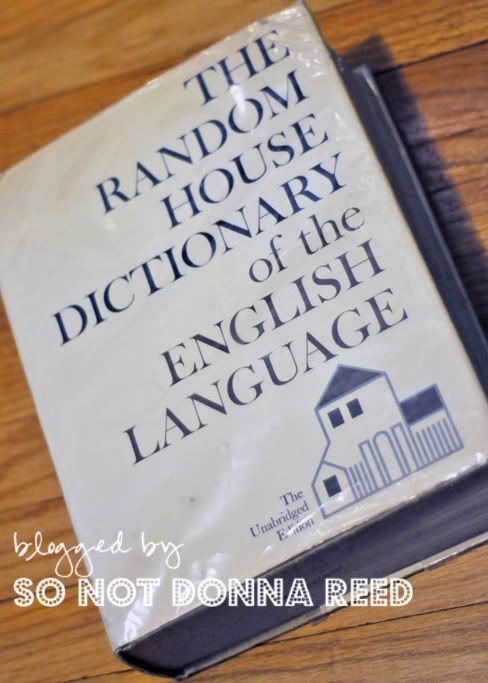
It all started with this old dictionary I've had sitting around my house for years.

Photobucket


You see, I'm a dork...meaning I love me some Scrabble. My mom picked up this massive unabridged dictionary when it was being discarded from a library, and she brought it up to my house so that we could get really seriously serious on game night. This baby was published in 1967. I love her. Her pages are slightly discolored, and she smells like the library, and, well, she's just so pretty. Which is why doing this project brought me a little bit of pain. But not enough pain to stop me. ;)

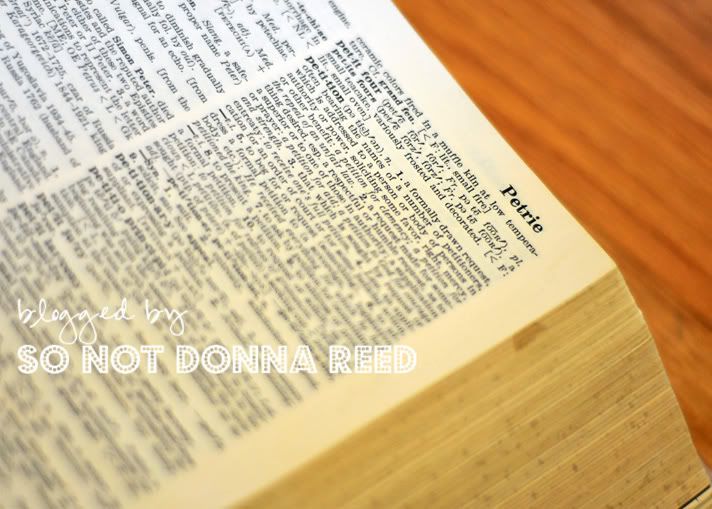
I'd been contemplating a project. I thought I'd do something for Valentine's Day, but I wasn't happy with using a definition of love, or romance, or marriage, etc. Partly because the definitions were located in funky places on the pages in this particular edition ~ and partly because, if I'm going to rip a page out of a book I want to display it for more than a few weeks a year. So I started searching for other words I could use instead. Family? Home? Create? Hmmm... And then, I thought I'd just check something out on a whim....and lookie here...

Photobucket


Yep, that would be our last name. Not only in the dictionary, but as the last entry on the page, earning it the spot of honor in the upper right hand corner. Awwwww, yeah. ;)

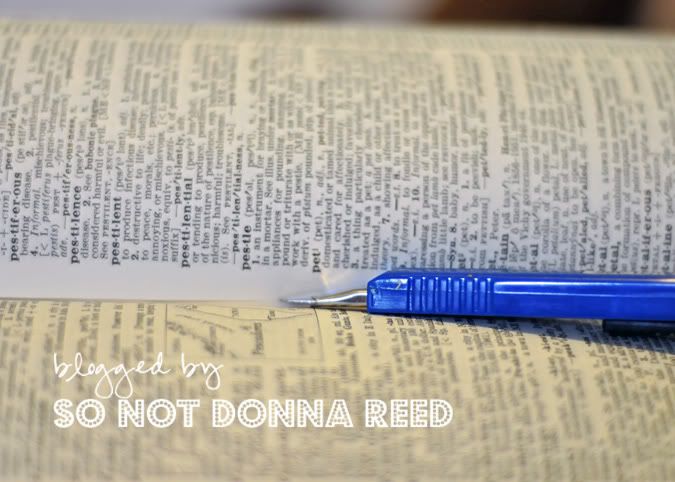
I started out by carefully cutting the page out of the dictionary using an exactoknife type thingy.

Photobucket


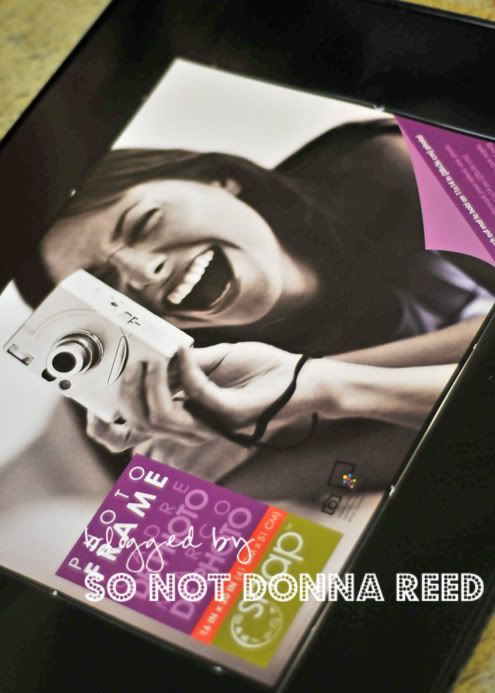
After much debate about whether or not to age the paper, how to display it, and worries of lots of icky results from Mod Podge being used on really thin paper, I decided to go a more classic route. I picked up a big (and ridiculously inexpensive) frame from Meijer ($6).

Photobucket


That center part, with the picture on it, was perforated ~ so all I had to do was pop it out, leaving the black mat around the outside. I considered leaving it in place, but figured that, with the thin paper, the color would show through. The dictionary page was smaller than the opening left in the center of the frame, so I used some cardstock I had on hand to cover the opening. I just laid it in place and attached it to the mat using double-sided tape.

Photobucket


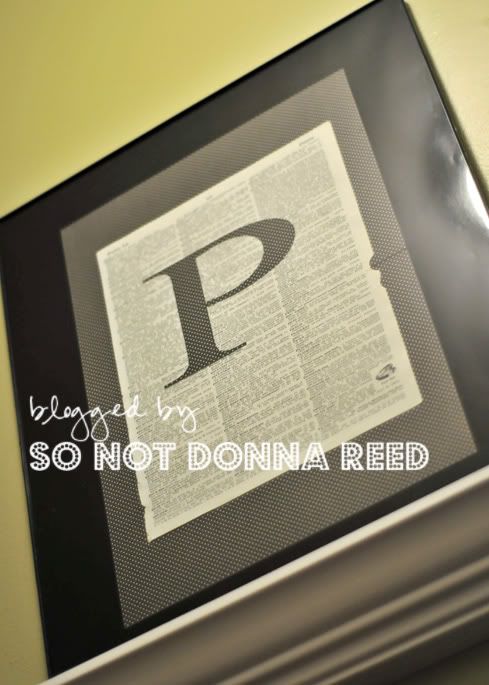
Once that was in place I centered the dictionary page, then carefully placed the "P" that I had cut out using my Silhouette. The placement of the letter was carefully calculated to be centered side to side, and to cover the "slang" definition of the word "peter". Mmmmmhmmmm...

Photobucket


Since the el-cheapo frame was a front-loader, all I had to do next was pop the glass back in place, and it was done!

Now, I'm not suggesting ripping up dictionaries all willy-nilly...nor do I think it would be good to go into a library and steal a page...but if you happen to find a dictionary at a garage sale, thrift store, or library book sale, snatch it up! You never know what word you might find that speaks to you.

And, I have to add, there is a lot of really super cool stuff in the back of this dictionary. Maps of...everywhere. Lists of landmarks, highest mountain peaks, tallest waterfalls, colleges and universities...tons and tons of stuff. So don't be surprised if she makes another appearance for more projects down the road!

Photobucket

Tuesday, January 31, 2012

Different

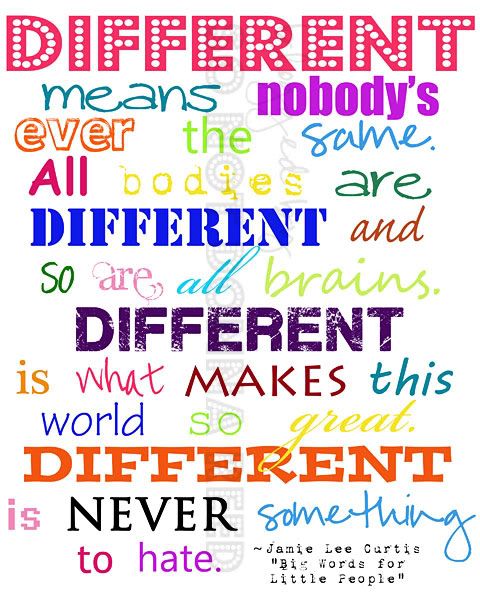
For all of you moms out there, especially moms of young kids ~ if you haven't already found the children's books written by Jamie Lee Curtis, you're {so} missing out. Make a mental note ~ or a real one if you need to ~ to take a gander at her books the next time you're at the library. She has several, and they all have wonderful messages. They are so good that, no kidding, I've been known to get a {wee bit} choked up while I'm reading them. My favorites are "I'm Gonna Like Me", "Is There Really A Human Race" and "Big Words for Little People". In fact, I like "Big Words" so much that I keep reading it to the tiny people even though they're fully capable of reading it themselves.

The books are filled with positive messages, and are great tools for teaching our kids about the world, and making them aware of their place in it. I like one of her "definitions" so much, I made a printable!

Photobucket


Here's a little linky-loo to the printable if you'd like to have one of your very own... :)
http://www.4shared.com/photo/oMwpEgbx/differentprintable.html

Photobucket

Thursday, January 26, 2012

Valentine Love

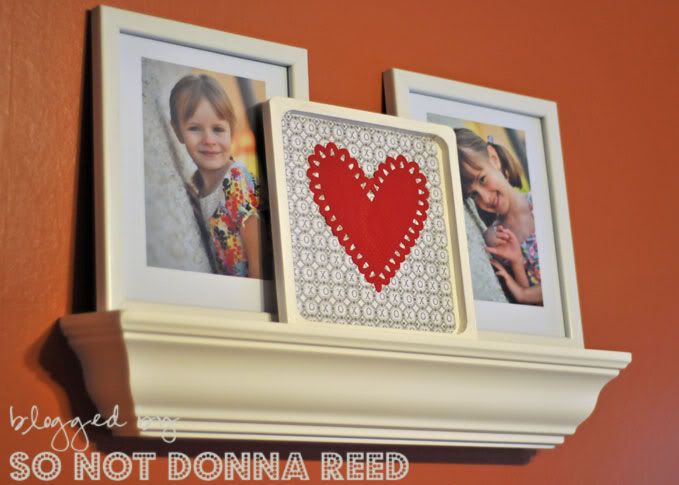
As I mentioned last year around this time, I'm not a big "decorate for every holiday" kind of person. I'm trying to get better about it, since these {tweener} holidays are a big deal for the tiny people ~ and I have that adorable wreath and those cute printables from last Valentines Day, so I figured I might as well keep growing the collection.

This year I made a cute, quick, and super-simple little project.

Photobucket

You may have seen a corner of it peeking out next to the shadow box bank in yesterday's post. Yep...that's because I made this one first. I'm getting crazy and posting out of order! Anyhoodle...this is what I started out with...

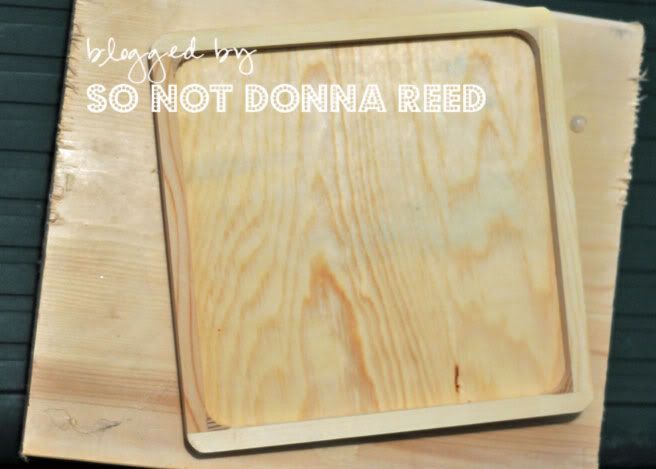
Photobucket

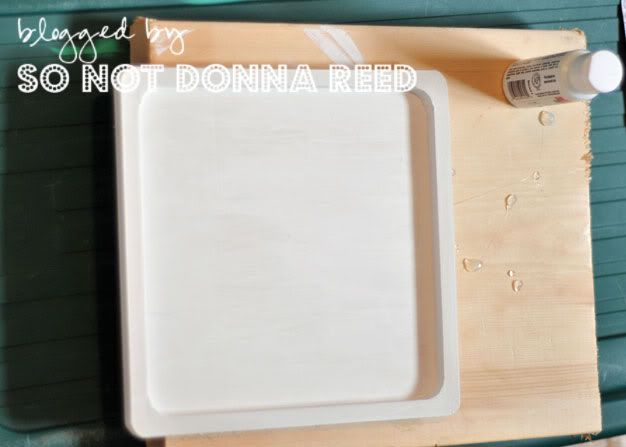
Just a simple little square-ish wood piece with raised sides that I found at Michael's. Since it's winter in Michigan, and spray paint and cold weather don't mix, I gave it a coat or 2 of white craft paint.

Photobucket

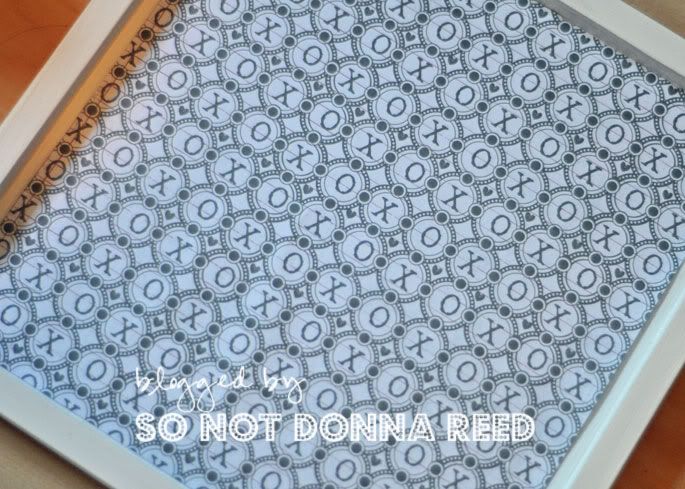
Easy enough. I picked up some cute Valentine's Day scrapbooking paper, too, and cut it down to size so it would fit in the recessed area.

Photobucket

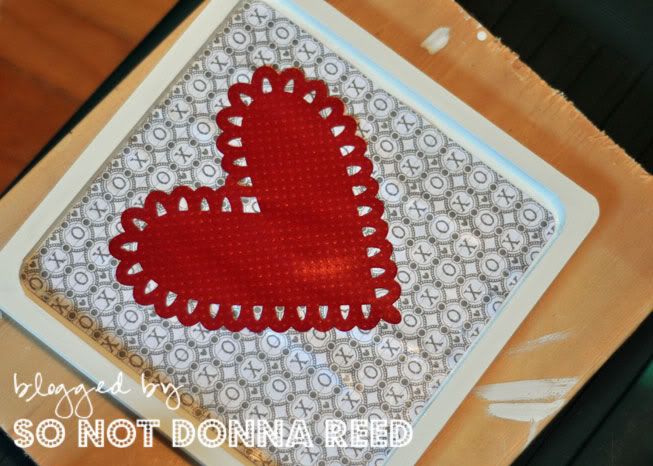
I used a coat of Mod Podge under the paper, and another coat over the paper. Then I stuck on this adorable red heart that I cut using my Silhouette machine. More Mod Podge (because you really can never use too much... ;) ) on top of the heart.

Photobucket

Being that I lack patience and wanted to get this {done}, I didn't wait long enough between coats, which caused the heart to bubble a bit. :( It is what it is.

So here's the finished product again, looking all cute.

Photobucket

Believe it or not, I have yet {another} Valentine's Day project up my sleeve. I KNOW! Who {AM} I!?!?!?!?!

Photobucket

Wednesday, January 25, 2012

Shadow Box Savings

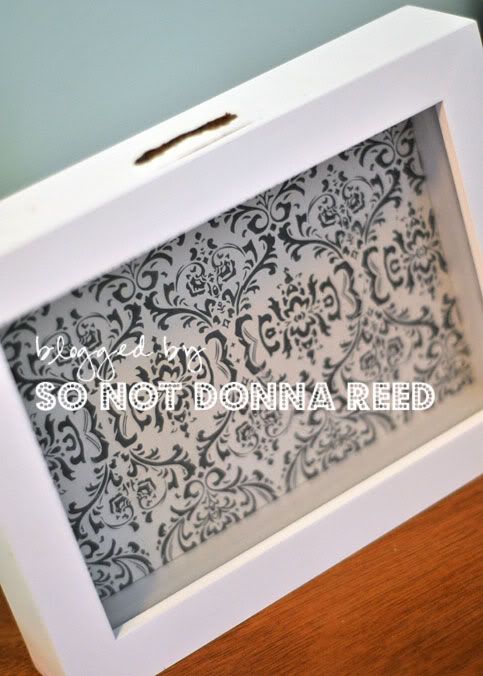
If you're on Pinterest (and you know you are!) you've probably seen some version of a shadow box bank. A lot of them are super cute ~ with pictures of Disney, or a special toy, or the Eiffel Tower in the background to remind the savers just what it is that they're saving for. I wanted to do something similar....so I did!

Photobucket


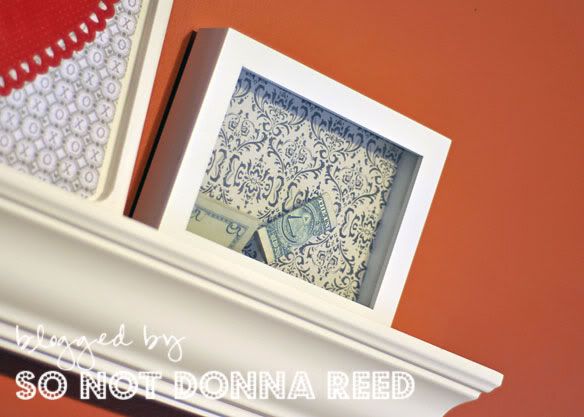
I did the easy part first. I popped the backing off of the shadow box frame, and attached some pretty scrapbooking paper to the back. I chose to use double-sided tape for this because I didn't want it to be permanent. You could use Mod Podge or spray adhesive instead if you wanted to. I also didn't personalize the paper to the project, because I'm still debating about using the money for a kitchen reno., or putting it toward a family vacation. Decisions, decisions.

Photobucket


Now the hard part. Making the slot for the money to be put through was a bit....tricky. The hubband would have had a {fit} if he would've seen me do this ~ and, honestly, I'm hoping he never reads this because he would be less than amused at the fact that I didn't "use the right tool for the job." What tool did I use? I used a drill. And a few different bits. I drilled 4-5 holes, as close together as I could get them, then switched bits to drill out the parts of the frame remaining between the original holes. It took about 20 minutes. And it was messy. And the slot doesn't look so hot. But it works, and since the hole is on the top, and I'm putting this puppy on a high-ish shelf, no one's going to {see} the slot, anyway. How's that for justification? ;)

Photobucket


Since the shadow box I used wasn't the best quality, the "glass" is actually plastic. I used a little Scotch tape to make sure it's held in place at the front of the frame. Then, I popped the backing back on, and voila!

Photobucket


All things considered, it was a pretty quick and easy project. I can't wait to watch it fill up!

Photobucket

LinkWithin

Related Posts Plugin for WordPress, Blogger...