Thursday, September 12, 2013

Your Girl for All Seasons

Fall is BY FAR my favorite season. The weather, the football, the changing leaves, the sweaters and boots, the football...did I mention the football? ;) But, I must admit, I was a little sad this year when it came time to put away some of our summer decor.

One of the things that I said, "Aww..." :( about was the {awesome} "Summer Nights" printable I got from Keri @ her blog, Shaken Together Life. (You can find it here)

See, when I was a kid, my friend Shawn & I watched Grease well over 300 times. But we watched Grease 2 even MORE, if you can believe it. So having a printable based on a song from the movie was perfect for my Grease-y personality. ;)  And the not-as-well-known sequel, well...there happens to be a song called "Your Girl for All Seasons", and it offered up the opportunity to make a {perfect} seasonally appropriate replacement.

 photo FallForMeResize_zpsed3b0f4f.jpg

The background is a paper I picked up from a facebook fan freebie by this lovely lady:
https://www.facebook.com/2amDesigns

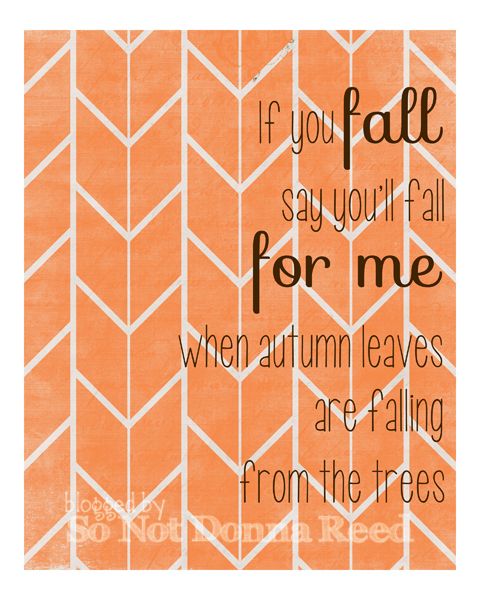
I just tweaked the color just a bit, popped in my lyrics and printed it out. And I have to say, I {love} it!!! In fact, I love it so much that I felt the need to share. So you can feel free to hop on over and grab a free download!

Enjoy!!!

xoxo
Sarah

Thursday, July 18, 2013

Welcome!

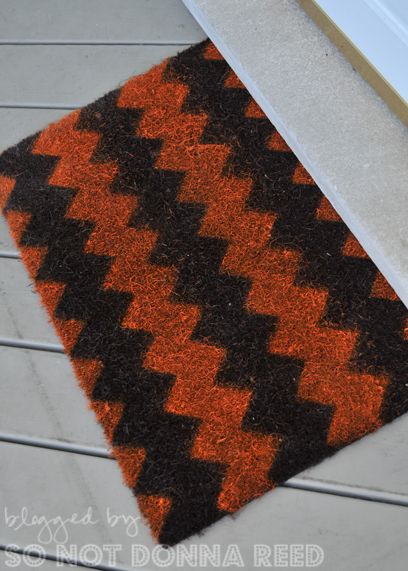
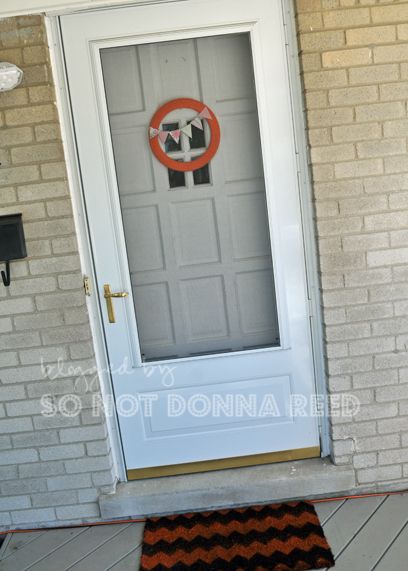
At Christmas, my mom gave me the most adorable welcome mat. It was a winter scene, with owls on a branch, dressed in winter hats and scarves. Flippin' cute as heck. But...winter is the season during which doormats really get {used}...and by spring it was pretty clear that my owls weren't going to last through more than one winter. It didn't make sense to me to store it for use next winter when it was looking so sad...and I couldn't justify going out and purchasing a new doormat when, aside from the decoration, the winter doormat was still in pretty decent shape. So I did what any DIYer would do. I busted out the spray paint!

I apologize for the sad lack of in-project photos. It's been a while since I've done anything crafty, and I'm out of practice with the whole "Hey! You should take pictures of every step!" thing. First, I painted the entire doormat brown. I then made a stencil out of poster board by tracing a template I found for free online. I cut out 2 stencils so that I could spray paint the orange stripes in the uncovered areas *between* the poster board lines. Did that make sense? Here's the end result...

 photo doormat1_zps06a261a0.jpg

Admittedly, the brown is looking a little black-er than I'd like - but with time & use it's sure to fade and weather and look perfect relatively soon. 

 photo doormat2_zpsbd080c88.jpg

I have to say, I love the pop of color it adds to the porch, and it just makes me happy! YAY!


Photobucket


Tuesday, July 2, 2013

Road Trip Fun!

Ahhh, Summer.... The time of year when many of us are loading into the car & heading out on seemingly endless drives for "vacation". I use the quotation marks because, let's face it, vacation with kids isn't much of a break for us moms. Technological advancements have made some aspects of car travel easier...but if you're like me, you're not a fan of just plopping in DVD after DVD and allowing your kids to numb their brains while you're passing through the countryside.

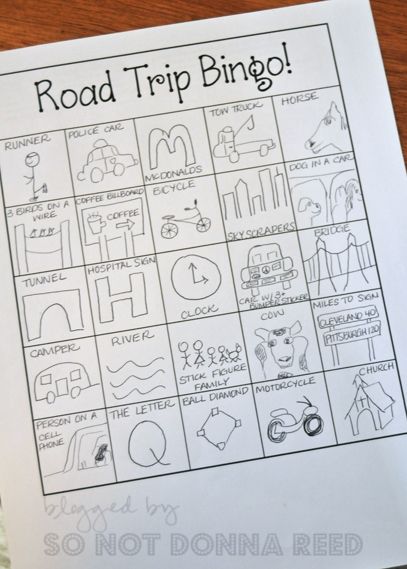
My family is spread out all over the place, with my sister living in Kansas City, and my brother living in Philadelphia, and me being pretty much dead center in Metro Detroit. My family has made a couple of trips in recent years for visits, and this is one of the tiny people's favorite things to do on the trip.

 photo BingoPic_zps0a4642e2.jpg

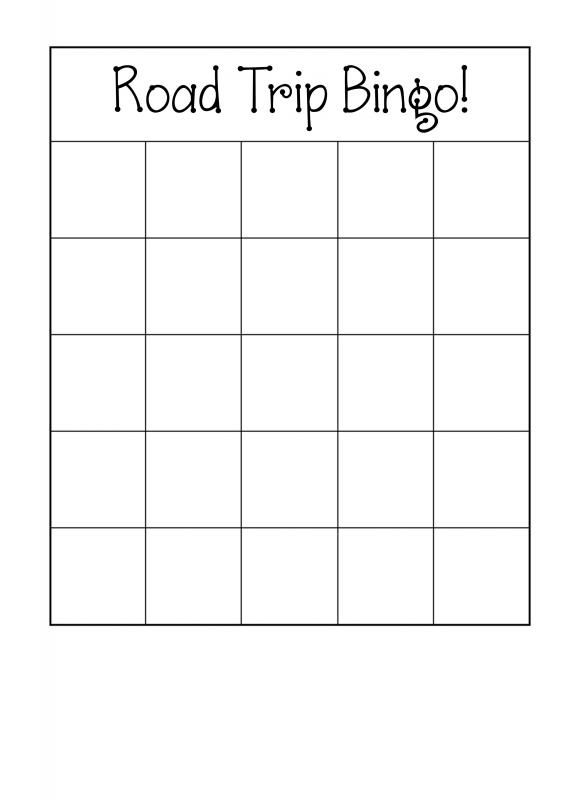
Obviously, I'm not the best artist, but I found it much easier to whip together a plain grid and draw in the items rather than dig through clip art galleries online looking for what I wanted. Here's the grid itself...

 photo RTBingoGrid_zpseb49274e.jpg

You can download the grid here: http://www.4shared.com/photo/BPCexaGo/RTBingoGrid.html

The nice thing about doing it this way is that you can customize the game for your specific trip, and your kids. For a trip through PA, I added tunnels to the game because I knew we'd be driving through some. If we were traveling from our home in Michigan and heading West to Chicago or Kansas City, we wouldn't be passing through any tunnels, but we might add more farm-related items instead - like tractors, or barns with advertisements painted on them. And if we were traveling North from home to Canada, I would probably add islands to the grid, knowing that we would pass Mackinaw Island when going into the Upper Peninsula.  I filled out a few of the grids, and took along some blank ones, too, so that I could change some of the items for the trip home. 

My kids didn't stop when they got a "BINGO" - instead they tried to find everything on the grid, and colored the items in as they found them, which made it more fun. For this part of the game, I strongly suggest giving each kid a cup to hold their crayons. Why? Cars have cupholders! ;) In fact, that's another of my favorite road trip tips. Cups. Put everything - food, pencils/crayons, etc. - in cups. It definitely cuts down on the mess.

Some of the other games we enjoy on road trips are: 

Zit - This is an old family favorite from my youth. Kids get points for spotting farm animals.  Only 1 animal per farm....so seeing a herd of cattle won't win you the game...and someone else in the car has to see the animal, too...so no cheating.  ;)  Wild animals don't count. First person to 21 points wins!
Chickens / Ducks / Geese - 1 Pt.
Cats / Dogs - 2 Pts.
Goats / Sheep / Pigs - 3 Pts.
Cows - 4 Pts.
Horses - 5 Pts.
White Horse - 10 Pts.
Old Man with a long white beard wins the game.

The great thing about this game? The kids are using Math! ;)

Name That Person - Each player takes turns picking a famous person. It can be anyone - a historical figure, a celebrity, an athlete, etc.  They give the other players the person's initials, and then the other players in the car take turns asking yes or no questions until someone can correctly guess the person's identity. For example - someone might say "I've got a person, and their initials are A.L." Good questions would be: Is this person alive? Is this person a man? Is this person from the United States?, etc. Eventually someone will figure out that "A.L" is Abraham Lincoln. :)

And then there are the well-known stand-by games that you've probably already been playing!

The Alphabet Game - Find letters A-Z, IN ORDER. Only 1 letter per sign.

The License Plate game - Finding license plates from each of the 50 states (you could add Canadian Provinces, too). Here's a link to a free printable to help with the game!
http://billygorilly.com/activities-printables/RoadTrip/pages/LicensePlateGame-state-list.pdf

I hope some of these games are helpful to you and your family. Enjoy & safe travels!


Photobucket

Wednesday, May 15, 2013

Putting the FUN in Fundraising

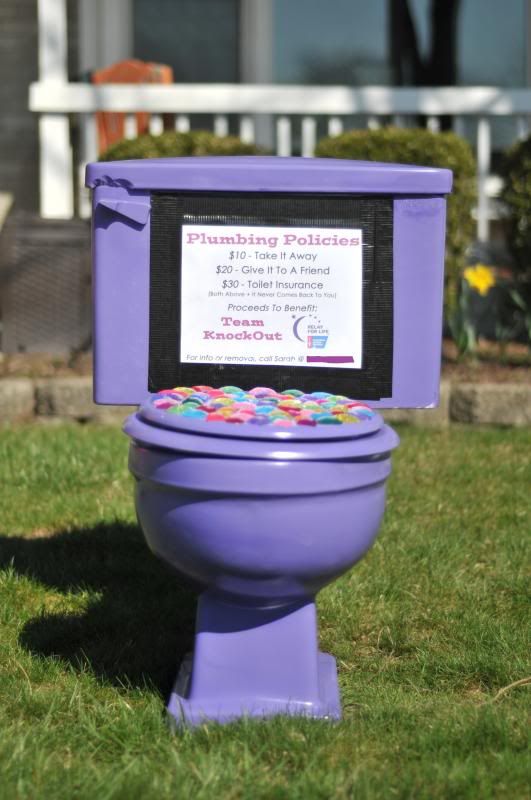
So, it's that time of year again, and I'm gearing up for our local Relay for Life. My team of 9 from last year lost 5...and gained FOURTEEN!!! Very exciting! We knew we wanted to do something fun this year when it came to fundraising, and of course I hit up Pinterest for some inspiration. Which is where I got the idea to do this...


 photo pottyforblog_zps98dbfa1d.jpg

Basically, you drop the potty on a lawn, and the homeowner has to pay to have it removed. $10 for removal, $20 to move it to a friend's house, and $30 for the above + the promise that it won't come back to them. So far (with 1 notable exception) everyone who has gotten the potty dropped on their lawn has been a good sport about it, and almost everyone has chosen to pass it on to a friend.

Now...I saw a couple different versions of the purple toilet...but could never get to a blog / site that gave me any information about the actual painting of the toilet. As you're probably aware toilets are made out of porcelain. Which you, allegedly, cannot just paint. Thanks to my friends at Home Depot, I got some great advice and can now pass it on to YOU, should you be interested in doing a similar fundraiser!

OK, so step one is to obtain a toilet. While it might be skeevy and gross to use a used toilet, it's also a helluva lot cheaper. One of my RFL teammates works for a builder, who happened to have access to a no-longer-in-use toilet that he was willing to part from. HOLLA! Free toilet! After a vigorous cleaning by 2 of my teammates the toilet was ready to go. First I hit it with a couple of coats of Zinsser spray paint primer. This stuff is a miracle in a bottle. Not only does it adhere to porcelain - you don't have to sand the porcelain first! I told you - MIRACLE. I was {not} looking forward to sanding a toilet, let me just say.

Once the primer was dry, I used good old fashioned Rustoleum spray paint in Grape (gloss) to give it a perfect purpley exterior. Isn't it lovely?

The most expensive part of the project was the jewels for the toilet seat. No...I'm not kidding. I used some heavy duty adhesive to stick them on - just to add a little sparkle and some color.

Once the toilet was painted, I designed the sign, printed it out, and used some fantastic connections to get that puppy laminated. Then I used duct tape to stick it to the toilet. :) DONE. The only other thing we did was write a quick letter letting the lucky recipient know who had sent them the potty, and telling them how to contact me so that they could have it removed from their lawn.

Petunia the Purple Potty has been in {several} yards, and has already brought in over $350 for the American Cancer Society ~ and we have a few weeks left to go!  Some of the paint has chipped a bit, and she's been targeted by a few birds, but other than that she's in pretty decent shape. Enough so that we'll probably use her again next year!


Photobucket

Sunday, January 6, 2013

...go after it with a club.

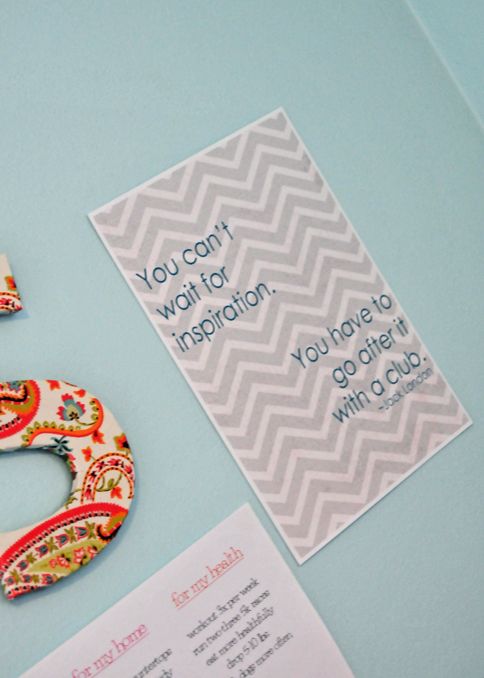
I love having my own craft room. It's so nice to have a place that's {mine} to sneak off to. But just because I have a place to be creative, that doesn't mean I'm always feeling incredibly inspired. I've been in a bit of a rut lately, and am just now getting out of the slump...even if I'm doing so one shared printable at a time. ;) I hope you all don't mind! Seriously, though ~ I have every intention of starting on a real hands-on (meaning non-computer-related) project very soon...although I can't say I have any clue what that project will actually be ~ but until then I wanted something new to look at to help me, hopefully, boost my creativity. I think I found the perfect quote.


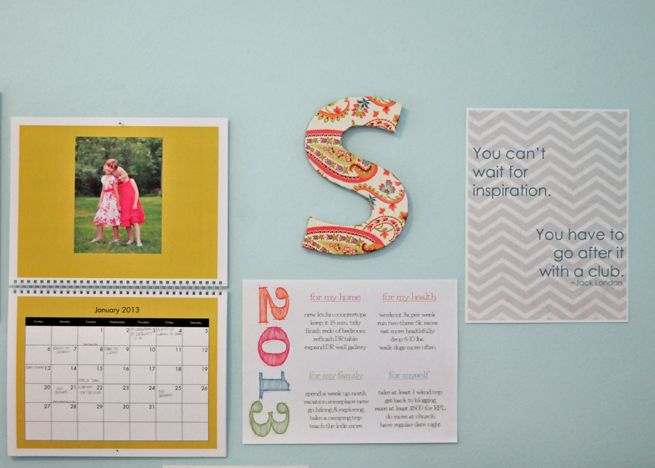
Here's what the finished product looks like...

Photobucket

I googled "quotes about creativity" and this quote from Jack London popped up. I just threw together a quick printable (seriously nothing fancy), printed it out, & stuck it on the wall over my desk.

Photobucket
It's the standard 8 x 10 / 8.5 x 11. If you like it, go HERE & grab it for yourself!

Photobucket

Wednesday, January 2, 2013

Valentine's Day Subway Art!


Like I said in my last post, I got a shiny new color printer for Christmas. It is quickly becoming my most favoritest thing. Well, maybe my 2nd favoritest behind my new Keurig. Have I mentioned that my in-laws rock? {Totally.} Anyway, having a color printer means that I've been making all sorts of fun new printables. I told you that would happen! Here's one I threw together today.

Photobucket

Gotta love some Valentine's Day Subway Art! She's a happy little 8x10. Feel free to go snag one for yourself! (And remember....if you don't have a color printer, don't dispair! Print it at your favorite photo lab!)
Photobucket

Wednesday, December 26, 2012

Another year...GONE!

 
Wow - hard to believe we're already at the end of 2012! Our holiday season has been filled with fun, and very very busy. Our elf, Elliot, was busy, too, and he got himself into all sorts of fun situations. He was crowned "Mr. North Pole" - complete with tinfoil crown and sash, and surrounded by a throng of Barbies. He zip-lined through the house using a candy cane. He put on a concert, went disco dancing, robbed the tiny people's piggy banks & was caught in the act by Sheriff Woody. He also colored the girls' noses red and put red felt noses on their lovies, went fishing for Swedish fish, drank the syrup through a straw, toilet papered the Christmas tree, replaced all of our stockings with underpants, and did his very best imitation of the Grinch. I didn't post his every move here - I figured there was enough of that happening in blogland...and Elliot had his own Facebook page, which was more than enough to keep up with! It sure was fun, though!

Now that Christmas is over (although the mess remains!) it's time to look forward to the new year. Like last year, I wanted to make a
Resolutions Printable. I put mine up on the wall above my desk so I can see it every day, and it helps me to hold myself accountable. I didn't do too badly with the 2012 list, and I'm hoping I can do even better with 2013!

Here's what the new printable looks like... I hope you like it! One of my gifts this year was a color printer (YIPPEEEE!!!), so I have a feeling there are going to be a whole bunch of new printables coming your way in the new year. :)


Photobucket

Wednesday, November 7, 2012

A Little Bit of Autumn

I love fall, and I especially love {decorating} for fall ~ but in this house that can't happen until Nov. 1st. See, the hubband tends to go just a little overboard for Halloween...and frankly, I don't stand a chance. I guess a pretty pumpkin and straw bale vignette would seem just a bit out of place among the spiders, skeletons, and tombstones....and the fog machine.

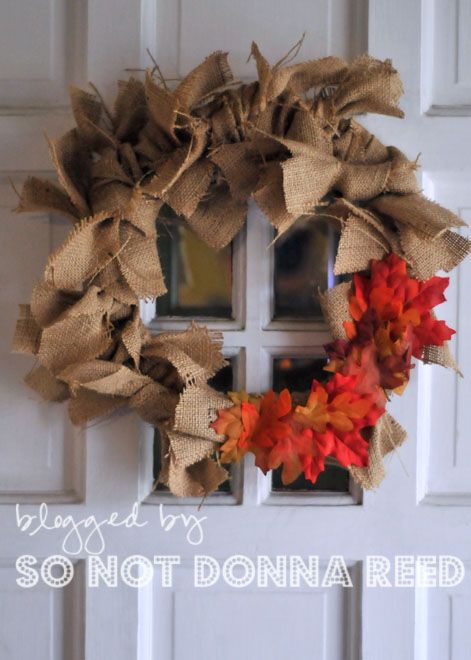
The second all of that is put away, I get to put up {my} stuff, and this year I decided that a new wreath was in order.

Photobucket

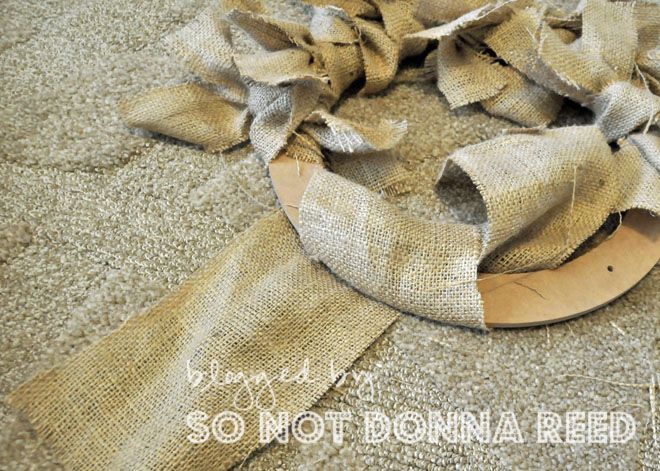
I started with my favorite flat wreath form and some good old fashioned burlap. I cut it into strips that were approximately 3-4 inches wide, and wrapped each strip around the form once to make sure I was covering as much as the form as possible.

Photobucket

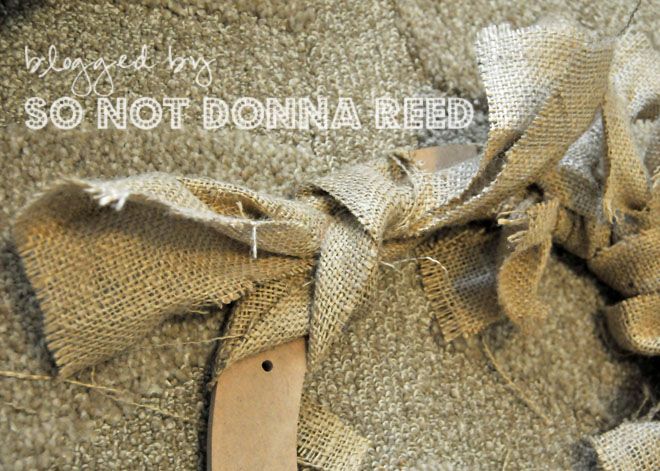
After taking the strip around the form once, I then tied the strip into a knot, pulling as tightly as I could.

Photobucket

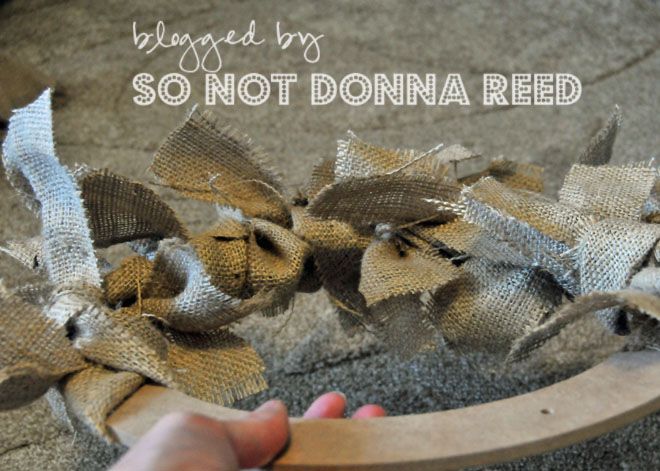
Some of the strips were a little on the long side, which made it easier to tie, but didn't end up looking the way I wanted it to, so I ended up trimming the ends. I frayed ends a bit, too, to give it a more rustic look,and also cut some of the ends length-wise to add more shape to the wreath.

Photobucket

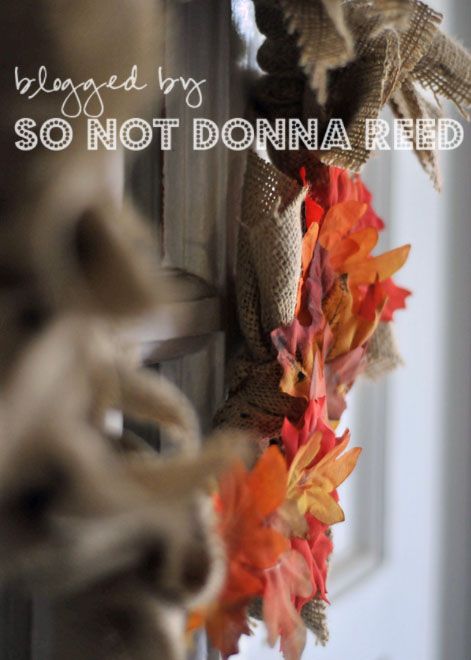
I left one section of the wreath a bit flatter as I was going, to leave a space to put on some fake leaves, using my trusty glue gun. I love the pop of color it gives!

Photobucket

It adds a bit of autumn happiness to our front door, and it was super easy and inexpensive to make. Win - Win - {Win}! :)

Photobucket


Photobucket

Monday, July 30, 2012

Go Team USA!!!


Every 4 years, you can pretty much count on me slowly melting into my couch as I watch every second of Olympic coverage available. OK, so maybe that's a bit of a stretch, but I do like to watch as much of it as I can, and the tiny people, apparently, feel the same way. They are {so} excited about the Olympics that my older daughter is wearing only red, white & blue, and both girls have made a banner to hang in our dining room to cheer on Team USA.

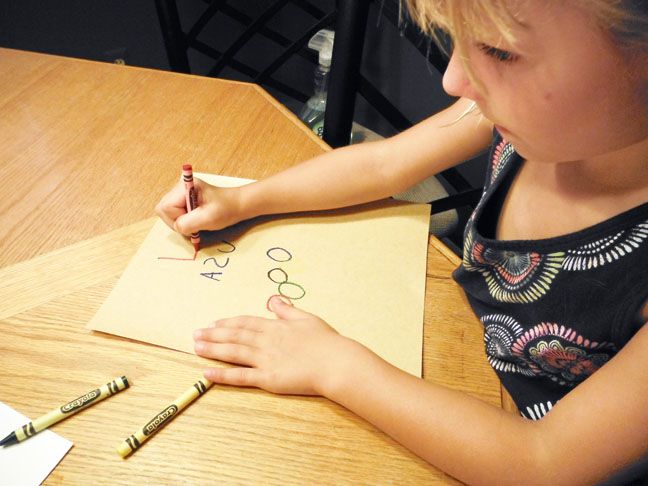
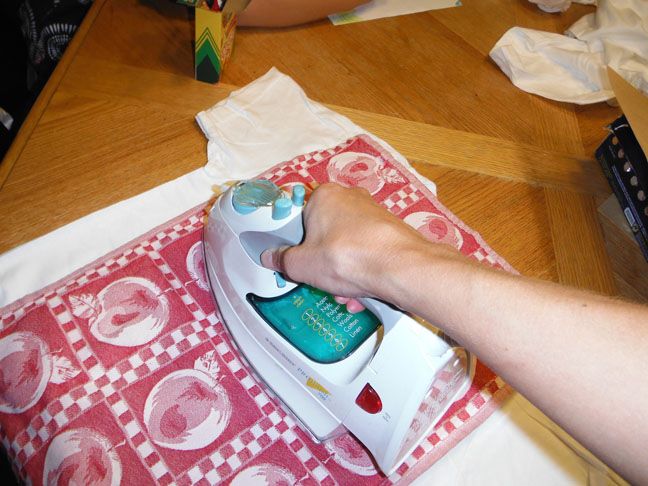
Having seen a cute idea for t-shirt making on Pinterest (of course...) I decided to offer them the chance to make their own Olympic t-shirts. They jumped at the chance. It's pretty quick & simple...and very inexpensive, depending on how much you want to pay for a shirt.

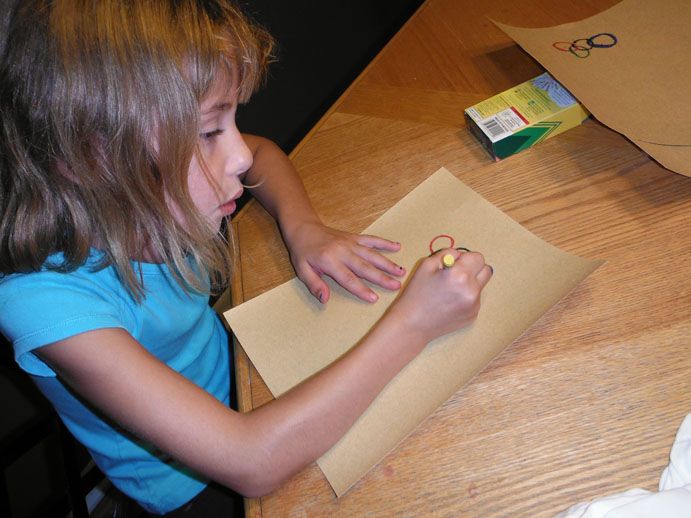
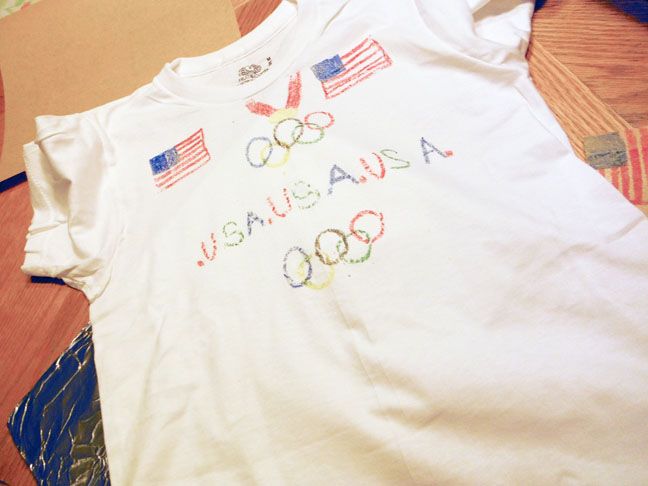
First, get some sand paper and fresh crayons. The finer the sand paper, the more solid the design will turn out, so we went with a nice fine paper to make sure everything would show up well. Then I set the girls loose designing their shirts. IMPORTANT: If you're writing words / letters, make sure you write them mirrored so that they will show up correctly when you iron the design onto the shirt. Here are the tiny people, hard at work. They both started over once b/c they weren't happy with their original designs.

Photobucket


Photobucket


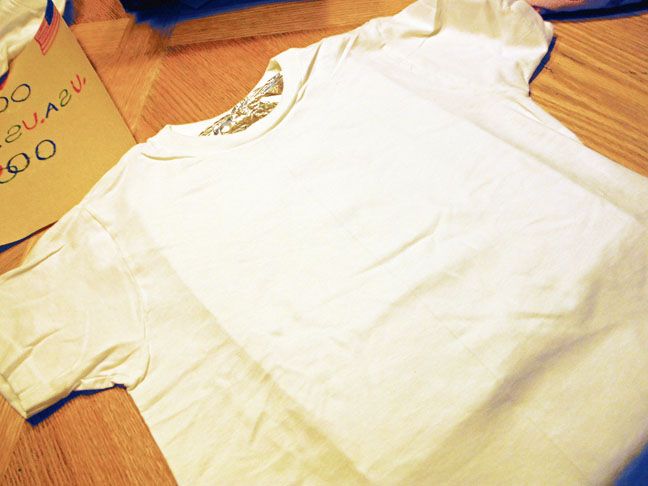
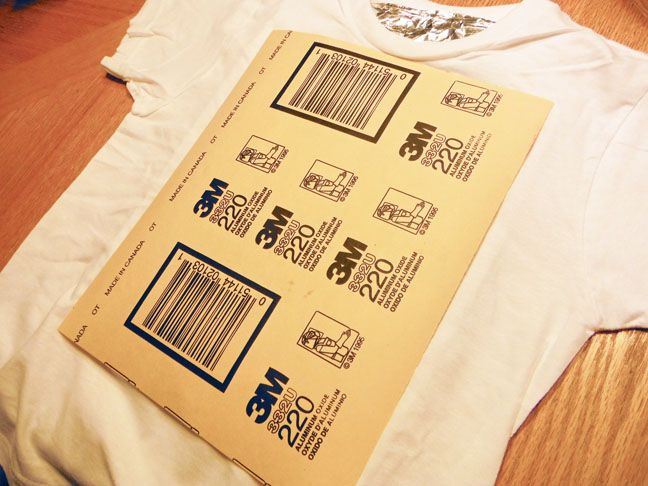
Next, you're going to take a piece of cardboard paper (I used the sand paper packaging) and wrap it in aluminum foil. Put it inside the t-shirt before you start to iron.

Photobucket


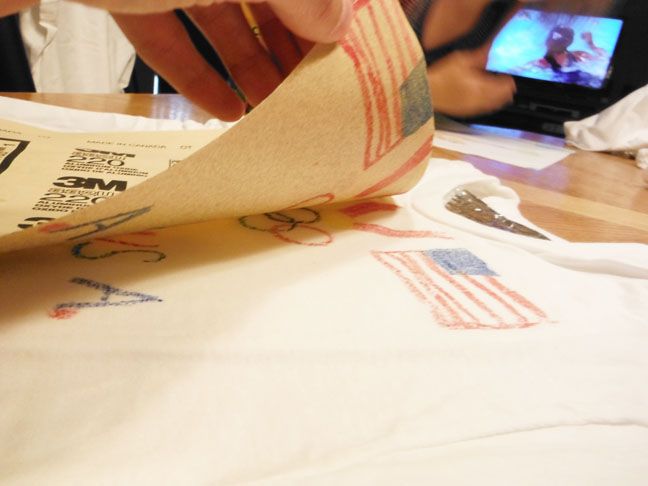
Place the sandpaper, design side down, onto the shirt. Make sure it's centered!

Photobucket


If you're concerned about your iron, you can put a linen dishcloth or paper towel on top of the sand paper to offer more protection. Hit it with your iron (set on the cotton setting) and Take Your Time. Better to be there too long than not long enough, right? Just keep the iron moving so you don't scorch anything and you'll be in good shape.

Photobucket


You can carefully pull up one corner of the sand paper to make sure it's working if you want to. Much easier to set the corner back down and continue ironing than it would be to try to reallign it if you lifted the whole thing.

Photobucket


Here's the not quite as tiny person's finished shirt. She was {thrilled} with how it turned out.

Photobucket


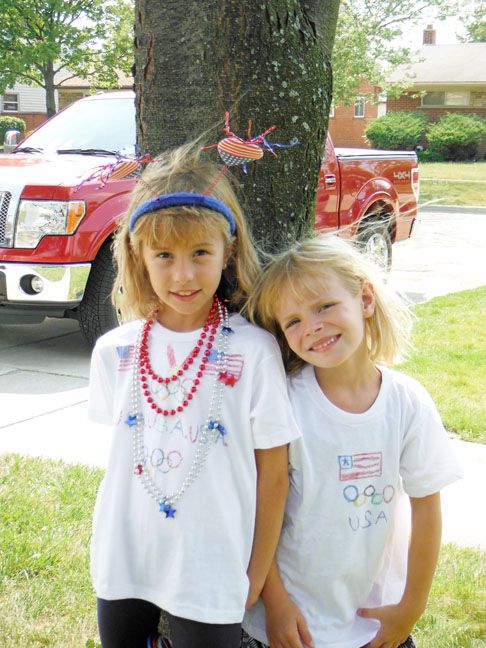
And here are both of the tiny people modeling their new creations.

Photobucket


Another blogger suggests setting the color by tossing the shirt into the dryer for 20 min. I was lazy and didn't do this. We'll see if I regret it. ;) The first time you wash it, was it seperately, and in cold water.

All-in-all, this was a great project for the tiny people to work on. It was fun for them, super easy, and the only thing they needed me for was the ironing. :) I'm sure we'll be doing this project again in the future!


Photobucket

Saturday, July 21, 2012

Recording Summer

Summer Vacation is in full swing & for me (for a lot of us, I'm guessing) that means activities, play time, fun day-trips, weekends away, full-on vacations, and the ever-present list of things we {have to} do. With all of that going on, I'm having a hard time finding time (and motivation!) to do some of the projects I'd like to do.

That doesn't mean I've been slacking completely. Though, I'm not gonna lie...it's close.

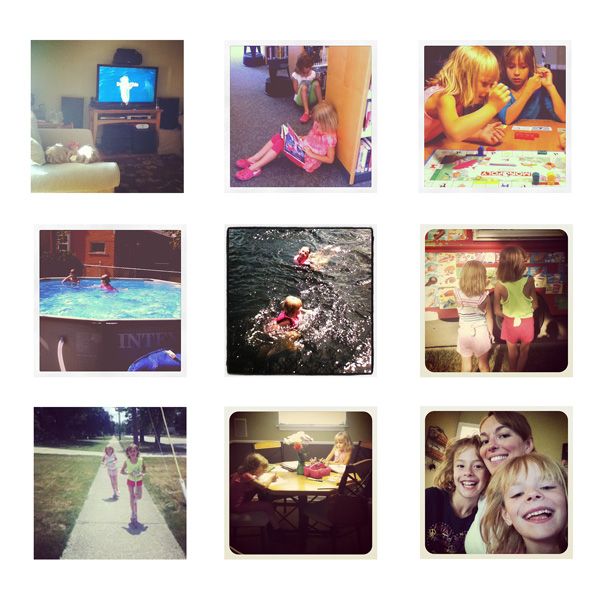
The project I'm sharing today is one that takes, literally, seconds. Every day this summer, I'm posting a photo on Facebook of what my kids are up to. I started on the first day of summer vacation (which was technically a half-day, as their last day of school let out just after noon) and I haven't missed a day yet. Usually I go with the easiest available method...Instagram. Here are just a few f the photos I've taken over our summer break, so far.


Photobucket


I realized pretty quickly that no one was going to be excited about seeing pictures of the kids swimming in the pool or us out on the boat every.single.day ~ so I took that as a personal challenge to try to get as many different types of activities as I could. Bike rides, trips to the library, getting treats from the ice cream truck, baseball games, fireworks, catching fireflies... These are just a few of the things we've done so far this summer. Next week we'll add a trip to the zoo, and see what other fun new things we can try.

It's a little late to do it now, but think about it for next summer, for sure. Recording something every day keeps you from falling into the trap of doing the same thing all the time, keeps your friends & family up on what you've been up to, and gets you in the habit of recording the moments - even if they seem mundane or boring - that make your life {Your Life}. And, bonus - if you're a scrapbook person, you'll have a lot to work with when summer is over and you have some time again! ;)


Photobucket

Tuesday, June 5, 2012

Fancy Wooden "Frame" Knock-Off...

I know I can't be the only one who gets a little frustrated with the craft blog / pinterest world. I see so many things I would love to recreate in my own home, but there's always something prohibitive. Either the project would have to be hugely modified to fit into my tiny home...or I'd have to have someone help me because I'm not good enough at sewing or using power tools to do it myself...or I'd have to attempt to justify spending what the hubband would think is a ridiculous amount of money on something that has no function or purpose other than to look pretty. Take this {beautiful} gallery wall from our lovely Jen at Tatertots & Jello. There is nothing about this that I don't absolutely love & adore. Except the cost. Not that these frames are over-priced ~ on the contrary, I believe they're very affordably priced ~ it's just that our budget doesn't currently have room for a wall of frames...+ shipping. (If yours does, you can find these awesome frames here... ) Not that we'd be sunk if I ordered them...but with kids who want to start dance classes, and my hopes of a family vacation this summer, and an upcoming family wedding (YAY!), I can find so many other, "better", uses for that money.


What my budget does have room for is a $3 unfinished wooden plaque from Hobby Lobby. Yep...$3. Get a load of these puppies...


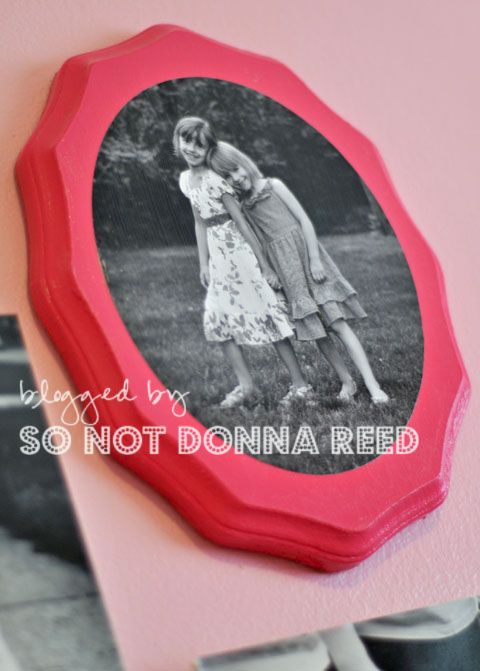
I used one of those, to make this...

Photobucket

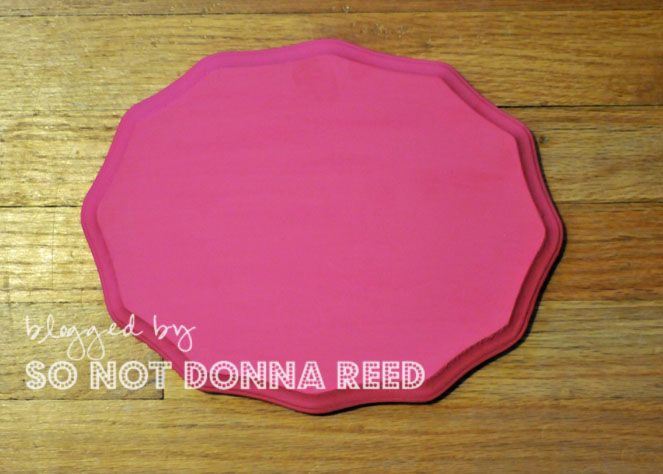
I chose the French Oval plaque for my first project. Knowing that I wanted to use it in my daughters' bedroom, I grabbed some craft paint in hot pink while I was there. You might be wondering why I chose craft paint instead of spray paint ~ and the answer is simple...it's less expensive. I sanded the edges of the plaque (I did a half-a$$ed job of it...I'm not gonna lie...) and put on a couple of coats of paint.

Photobucket
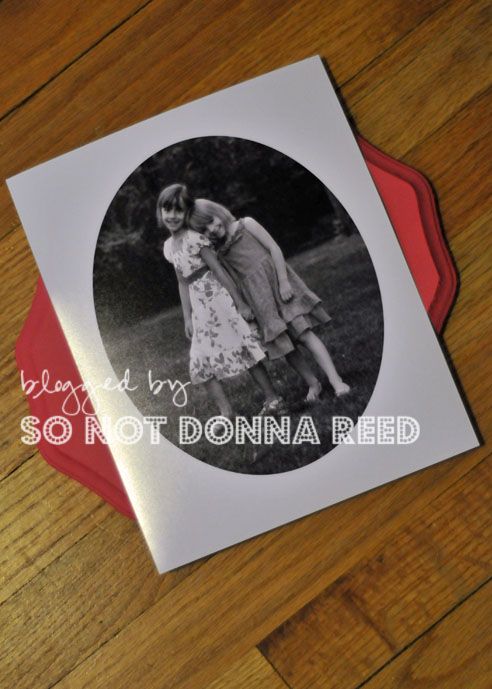
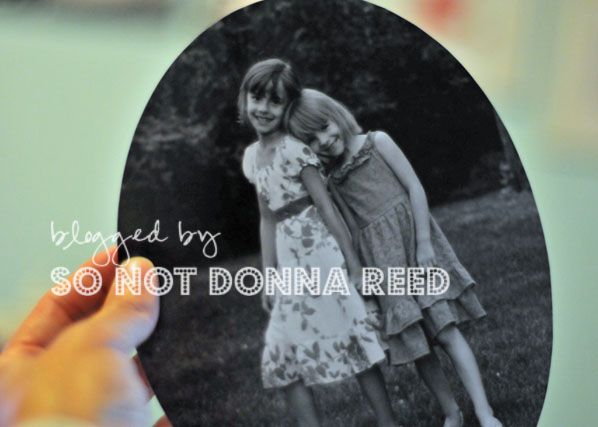
After I had the plaque, I realized that I didn't have a photo that I was really excited about using. So a trip to the park with my subjects had to happen. I was lucky and got a great shot of them that I just love. Looking at the photo and the plaque, I decided that the hard edges of a rectangular picture would be a bit harsh against that soft lines of the French Oval plaque ~ so I worked a little photoshop magic. Once I had the photo transformed into an oval, I moved it onto a plain white background, floated it in the center, and ordered an 8x10 print from my lab.

Photobucket
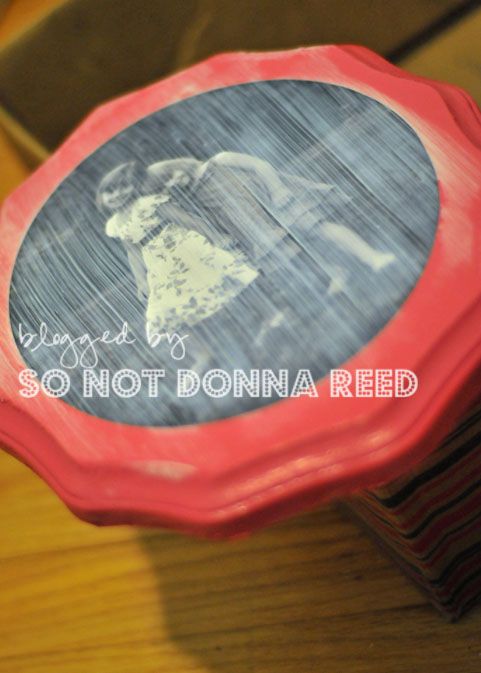
Now for the hard work. ;) I cut out the picture, then covered the plaque with an even coat of ModPodge. Then I carefully placed the photo in the center of the plaque, and gently worked out the air bubbles under the picture. Now...I'm notorious for getting all excited at this point and rushing through the next steps because I just can't wait to see how it's going to turn out. Let me tell you ~ that is one surefire way to get wrinkles and ickiness on your picture. So I had to work reallllllly hard to walk away and let it be for a while.

Photobucket

After the first coat of ModPodge had dried, I came back and put another coat over the whole thing...picture and all. If you're wondering why, there are a couple of reasons. First, I'm using gloss / lustre MP, rather than the flat variety. There's no real reason for that decision ~ it's just what I have and I'm not buying new when I have some left. If I just did the frame, the frame & the photo wouldn't match in sheen, and I wanted them to match. Also, MP gives a bit of protection for the photo itself.

Photobucket

I let it dry overnight, and then today, while the girls were at school, I mounted it on the wall in their room using command strips. (LOVE those things!)

Photobucket

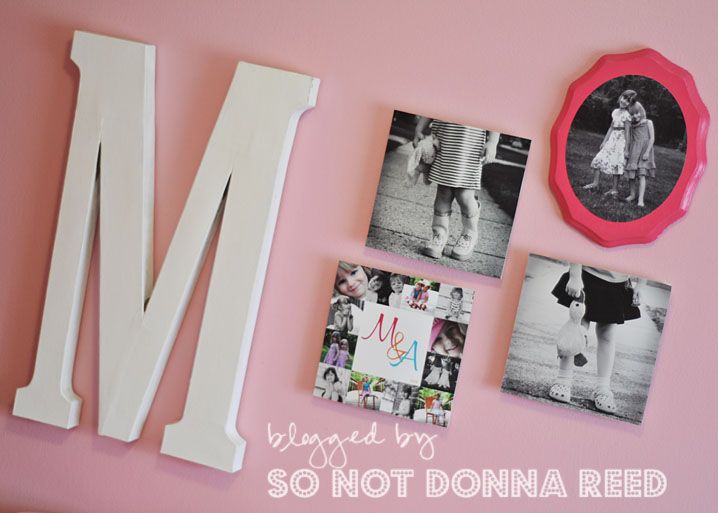
Here it is with a bit of context.

Photobucket


I have every intention of doing this again, probably a few times. I'd like to add a couple of these to the gallery wall in my craft room, and I'm kind of {loving} the idea of this kind of frame for a seasonal holiday pic of the tiny people.

So...the plaque was $3 ~ the print was $1.50 ~ the paint was around $1 (and I have plenty left over). I had sponge brushes & ModPodge already. So we're looking at a grand total of right around $5.50. Yeah, I think my budget can handle that. ;)


Photobucket

Thursday, May 3, 2012

You Don't Wanna Miss This!

If you do the whole digital scrapbooking / hybrid crafting thing, you know how great freebies are. Even better when the freebie comes in the form of a {huge} and spectacular collaboration kit! That's what I'm here to tell you about. Head on over to Design House Digital & hop on their blog train! This blog train isn't one of those obnoxious ones where you have to download a chunk from each blog & it takes forever, and you end up getting at least one link that doesn't work so you end up with an incomplete kit. Oh, no.  They did this {smart}. You pick up one letter at each blog, and those letters together are your coupon code to pick up the kit for free! Soooo much easier. Check out the rest of their freebies while you're visiting ~ they've got some great ones!!! Enjoy!

  Photobucket

LinkWithin

Related Posts Plugin for WordPress, Blogger...