Sunday, March 27, 2011

Gotta Love {FREE!}

See this stack of wood?


Photobucket


Pretty, right? Wanna hear a secret? All of this wood...every last chunk of it...was {free}. Seriously!


Photobucket


If you live near a lumber yard, give them a call & see what they do with their scrap wood. The place up the road from us tosses scraps into bins, and then they pull the bins out into the parking lot when they're full. They don't have to pay for disposal...and whoever gets there first gets some free wood. It's a win-win!


It's win-win for us, too! The hubband gets some clean dry wood to use for starting fires, and I get to poach wood from the stack when he's not looking so I can use it for projects! :) What's not to love!?!?! Now....to narrow down the ideas and get crackin'!


Photobucket

Friday, March 4, 2011

A Smidge Irish

I'm a Mutt. I'm a little bit French, German, English...and a little bit {Irish} too. I can't say why, but I have always {felt} more Irish than anything else. And this is my favorite Irish Blessing. Enjoy!

Photobucket


Download Printable Here

Photobucket

Tuesday, March 1, 2011

Silhouette & ModPodge...2 of my Favorite Things!

Today, I got down & dirty with the ModPodge and made this....

Photobucket

Out of this!

Photobucket

I found it on sale for ~ you're not gonna believe this ~ $1.08! {Seriously!} I was so proud of myself ~ I {never} find deals like that! Anyway... I hit the craft store and bought some papers that made my heart happy. Then I measured the blocks and used my Silhouette to cut the background paper to size & cut out all of my letters. I quickly realized that I wouldn't be able to see the larger letters well enough for my liking if I didn't put something solid behind them, so I went back to the Silhouette & cut out the black circles. I used ModPodge to adhere the background paper to the blocks & the circles to the backgrounds. (The blocks were painted an off-white-ish color on the sides and back, so I didn't have to paint anything. Bonus!)

Photobucket

Once that was dried, I used more ModPodge on {top} of the circle to hold the large letters in place.

Photobucket

A little more ModPodge glued down the smaller letters on the bottom of the blocks.

Photobucket

A layer of the good stuff over the top of the whole block holds everything down and gives it a nice little sheen.

Photobucket

And here's the finished product!

Photobucket

Not bad for less than {$5}, right!?!?! And...I left the Xs and Os on the other side, so I can use them next year for Valentine's Day. That's right, folks ~ this ones a 2-fer!

***Linking up @ 30 Days and Tatertots & Jello

Photobucket

Monday, February 7, 2011

Scarf It!

If you're looking for a quick, easy, fun and fashionable project, I've got just the thing for you! It's called a ringlet t-shirt scarf, and I {promise} you, you can knock one of these babies out in no time. I can also predict that you'll probably be planning the second one before you're finished with the first.

For starters, let me show you the finished product.

Photobucket

Cute, right? Oh, you're so silly...I didn't mean {me}....but thanks. ;) I first saw this idea at Kevin & Amanda and had filed it away in the recesses of my brain. I'm so glad I did!

OK, to get started you're going to dig through that stack of old t-shirts that you've set aside to donate / cut up for dust cloths / paint in. These are the ones I chose to use (although I didn't end up using the white one).

Photobucket

Next, you're going to cut off the bottom hem & set it aside. You'll use it later. Then, cut the shirt into {strips} about as wide as your thumb (give or take). Like this...

Photobucket

It's not very clear from the photo, but you're going to lay the shirt out flat, and cut through both the front & back of the shirt, leaving it attached at the sides. The resulting strips will actually be enormous ovalish circley loop things. Once the strips are cut, you're going to stretch the living daylights out of them. Just grab the ends of the loop and pull. Then you're going to wrap the shirt in {rings} around your hand. See?

Photobucket

When you've cut up all of your shirt strips (my scarf uses 35), and wrapped them all around your hand to make pretty little circles, set them out in front of you to determine what kind of pattern you're going to use.

Photobucket

Next you're going to take the hems that you cut off of the shirts, cut those into strips about 4-5 inches long and use them to tie the loops together. If you want to only use one color for the ties, you can also cut the hems off of the sleeves of the t-shirts.

So, dig through those garbage bags that are waiting to go to Good Will, find a color combination you like and go to town! I'm already planning a Detroit Tigers-esque orange/white/blue scarf, as well as a nod to my high school...a little purple/gold/white action. What are {you} going to make???

Photobucket

Friday, February 4, 2011

Can You Handle It?

I'm not sure if you can.

Because it's just that {riveting}.

Yeah, I'm totally bluffing. I haven't done a darn thing since the last time I posted. We've battled illness, had people home from far too many days of school, gotten ridiculous amounts of snow, and let the house reach the point of, "Oh....crap....I don't even know where to start cleaning!"

Winters in Michigan mean cold temps that aren't kind enough to allow for spray painting, which means that I haven't yet finished the Valentine's Day project I started 2 weeks ago. My Silhouette machine has started letting out this low, pathetic-sounding {sob} to make me aware of how neglected she's feeling...but I don't have any pretty paper in the house and no projects on my list, so...she's gonna have to wait.

It's sad, really. Hopefully, if things go as planned (stop laughing), I'll have both tiny people back in school every day next week and I'll be able to take some time to do some of the things I {want} to do rather than the things I {have to} do to keep afloat. Until then....I'll be trolling TT&J's weekend wrap-up party, looking for inspiration.Photobucket

Monday, January 24, 2011

Looking for some Inspiration?

Head over to Somewhat Simple and check out all of the {amazing} Valentines Day decorating ideas folks are sharing! You're sure to find something you just can't wait to try!

monogram

Photobucket

Thursday, January 20, 2011

Library Tote Bags

I love our library. I love taking the tiny people there, and letting them play with the puppet theater and puzzles, and listening to them chatter as they pick out new books. What I {don't} love is searching high and low for all of their books when it's time to return them. In their beds, behind the couch, between the mattress and the wall, in the laundry chute...you name it.

In an attempt to help the tiny people keep their library books in one place, I decided to give them each their very own library tote bag ~ so they can choose their own books, bring them home in their totes, and return them to their totes when they're finished reading them. It might work...it might not....either way, I think these are cute!

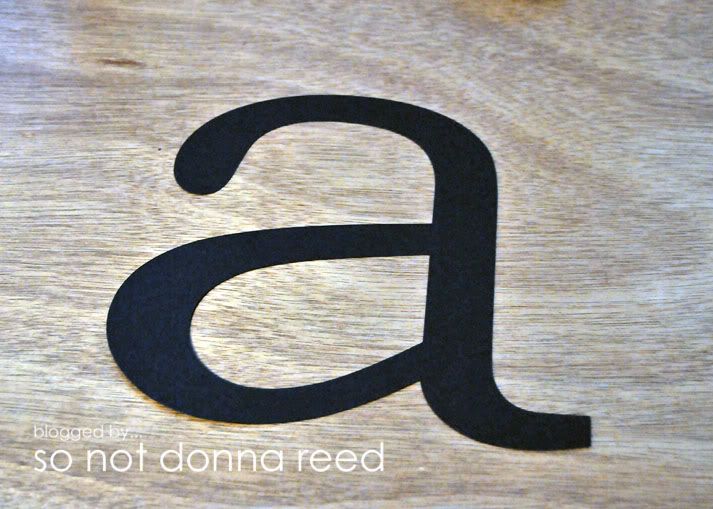
To start, I used my handy new Silhouette machine to cut out each of their first initials.

Photobucket

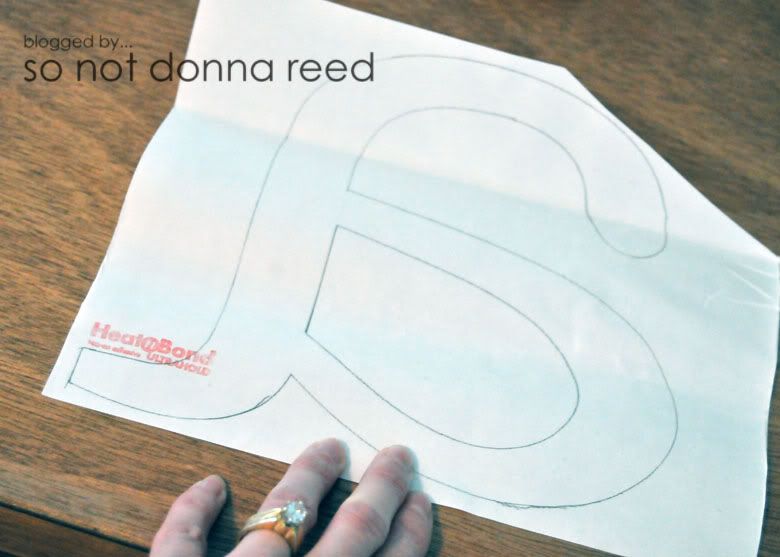
Next, I traced the letter, backwards, onto a sheet of Heat n Bond.

Photobucket

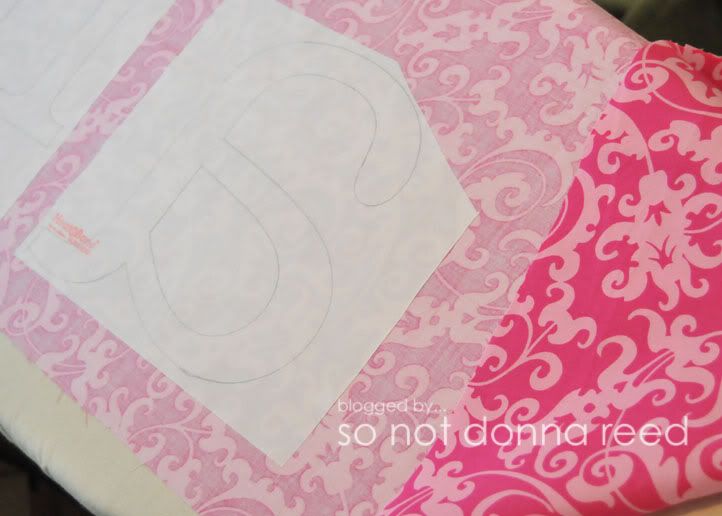
Following the direction on the HnB, I ironed it onto the wrong side of my fabric of choice.

Photobucket

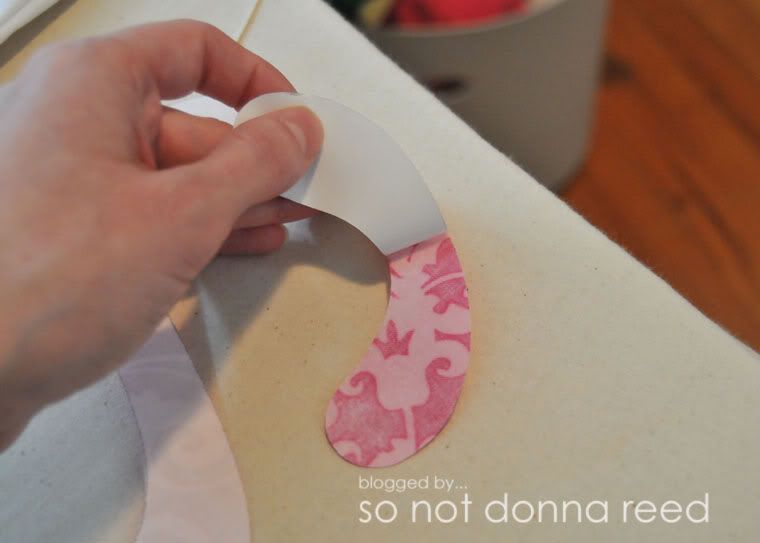
When it was cooled, I cut out the letter. This is a good time to bust out your bottle of FrayCheck & apply it to the edges of the fabric so your letter won't get all funky & frayed.

Photobucket

Next, I peeled off the backing....ooooh....aaaahhhh...

Photobucket

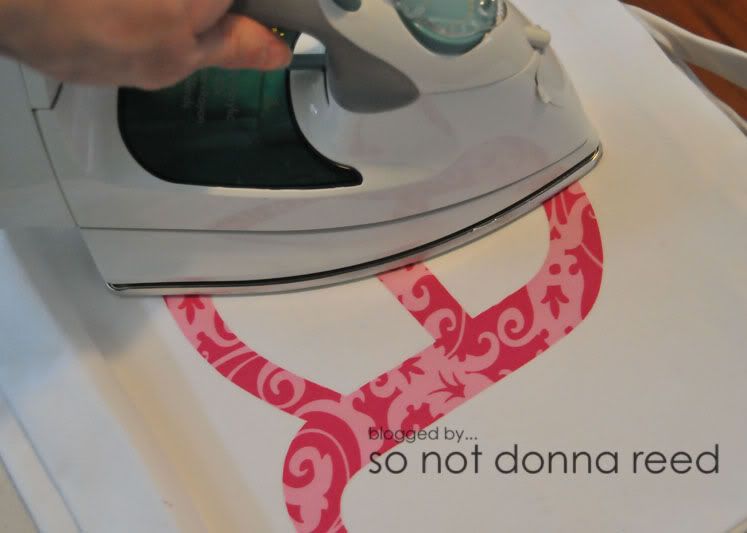
and ironed it onto the tote bag.

Photobucket

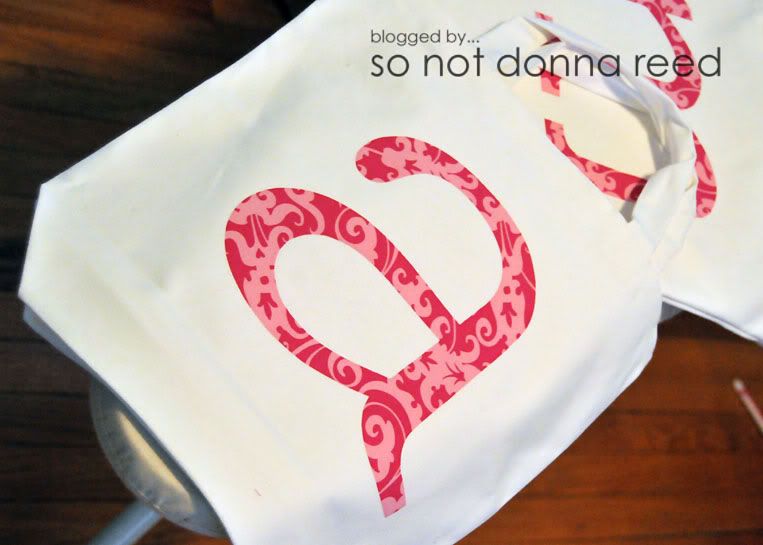
This is the final result ~ pretty {cute} isn't it? The tiny people have already found their books and put them in the totes, so I feel like this might just work! And, I like theirs so much, I just made one for myself. :)

Photobucket

On a totally unrelated note ~ my entire family, myself included, has been infected with the most {horrendous} cold imaginable. We're all sick. Even the hubband, and that never happens. The tiny people have been home from school, and we're living in our pajamas. Here's hoping all of you are feeling well!

Photobucket

Saturday, January 15, 2011

Love Songs, etc.

I have a few Valentine's Day printables to share with you lovely people today. All of these are 5x7s ~ {enjoy}!

Photobucket

Download 1

Photobucket

Download 2

Photobucket

Download 3

In other news, the hubband got me a fantastic gift for my birthday ~ a Silhouette SD! {squeal!} I'm beyond excited to get going on some craft projects and break her in! Unfortunately, I'm currently single-parenting while the hubband is off on an ice-fishing adventure for a week (you can say it....I think he's crazy, too) and I'm also trying to fend off a really inconvenient and unwelcome cold. It's a good time around here. So all the plans I have swimming in my head are currently on hold while I sleep as much as I possibly can and try to get through the day without taking too much cold medicine. Such will be the case until I feel like I'm human enough to go out in public. It could be a while! ;)

That's all I've got. Have a fantastic weekend & don't forget to swing by Tatertots&Jello to check out the weekend wrap-up!

Photobucket

Thursday, January 13, 2011

Imagine...

I love song lyrics. Really, a song is just a poem set to music, and I think that so many songs put things into words in a far better way than I could ever manage on my own. I started working on a few printables this afternoon ~ using lyrics from love songs, and aiming for Valentine's Day. But my mind keeps turning back to what happened in Tucson last weekend, and what our President spoke about last night. I do hope we can change the tone of our speech & take the hatred and vitriol out of politics....and that we can begin to look at our nation & our democracy in the same way that I believe we should look at our environment ~ not as something we have inherited from our ancestors, but rather as something we have borrowed from our children.

The more I thought about the lives that were lost in Tucson & the legacies they leave behind, the more John Lennon squeezed his way into my brain. So, while more lovey-dovey printables will be coming your way soon...for now, I'm going to share this. Enjoy.

Photobucket

Click here to download ~ the file is an 8x8.

Photobucket

Tuesday, January 11, 2011

Hearts & Hot Glue

I've never been big on Valentine's Day decor, but this year I'm warming up to the idea. I started with a wreath...

Photobucket

This was super easy to do, might be a little harder to explain, but I think the pictures are going to be a big help. I started w/ a flat wreath, b/c they fit so nicely between the door and the storm door, and they're so inexpensive! To get going, I busted out the hot glue gun and started glueing down the ribbon. I left a loop-ish sort of thing about every inch or so.... See?

Photobucket

Once I'd gone all the way around the wreath, I went back and glued down the loops...like this...

Photobucket

So this is what it looked like when I had finished messing with the ribbon.

Photobucket

Then I did the handy-dandy "in-half and in-half again" fold with the cupcake liners, and folded again at the bottom to give me a flat surface to glue to the wreath. (You've seen cupcake liner wreaths before, right? You know the drill.)

Photobucket

I used a combination of happy red liners w/ white polka-dots, and plain old white liners ~ about 2-3 red for every 1 white. It added a little dimension to the wreath that I thought was missing otherwise. This is what it looks like from the side.

Photobucket

A pic (again....b/c I only took one) of the finished product hanging on the front door.

Photobucket

See? Cute, right? And totally worth burning the dickens out of my fingers with the glue gun.

Photobucket

Monday, January 10, 2011

You Look Familiar...

If you've spent any time at all rambling around blog land (and let's face it, if you're here...you've rambled) then you've probably seen family wall art items like this one before...

Photobucket

The first one I stumbled on was made by Amy at My 3 Monsters. (You can find hers under her "Favorite Projects" tab.) I immediately {loved} the fresh, funky and modern take on the traditional family name theme. Since then, I've seen several different versions of the same on at least 5 different craft blogs. Of course, I had to make one of my own.

Add me to the list of people singing the praises of Leo Reynolds' Flickr Photo Stream. He's been kind enough to allow us all access to his photos, free of charge! Please, PLEASE, don't be the person to ruin this for the rest of us by taking advantage of his kindness and using his photographs to make art for profit...b/c then you would really suck. Just sayin'.

The first thing I did was go through the photos and choose the ones I wanted to use. Just to warn you ~ this part of the process could take {forever} if you're not the type who can make a quick decision. There are just so many photos to choose from! I downloaded the "large" sized files for the photos I wanted to use and saved them to my computer. I did a little thinking and decided that I wanted to print this out as an 12x18, so I opened a new file in that size in photoshop. Then I did the good ole' drag & drop onto the canvas, adjusting the size of each photo and realligning everything until all of the letters & numbers were equally-sized and evenly placed. That took a little time, but once you've got the first row down it does get quicker & easier. If you're using a program that allows you to show a grid on your project as you're working, USE IT. That was a {huge} help in keeping things straight and even.

Once I was finished lining everything up, I combined all of the layers except the background, then I resized that layer to 85%, which left a nice white border all the way around the letters. This is what I ended up with.

Photobucket

Being that I like to change out our art on a regular basis, I chose not to frame this project. It's just easier for me to take things down and move them around, or set them aside for a while, if I can stack them neatly and not have to deal with finding a place to store them in their frames. All I did was mount the photo to a piece of foam core board using spray adhesive. Super quick & easy!

I'm thinking they'd make great {gifts} for weddings, house warmings, etc. ~ and I can't wait to make more of them!

Photobucket

Friday, January 7, 2011

It's the Weekend!

Hey, all! Just a reminder to head over to Tatertots & Jello and check out all the Wrap-Up Party goodness that's going on over there! :) It's worth it...trust me!

Also, I'm working on an {amazing} new project right now that I can't wait to share with you all ~ so make sure you check back soon!

Photobucket

LinkWithin

Related Posts Plugin for WordPress, Blogger...